mate
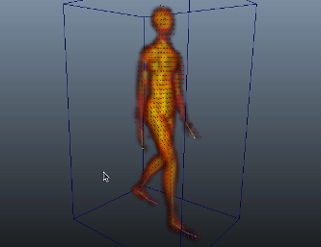
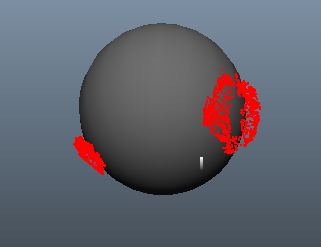
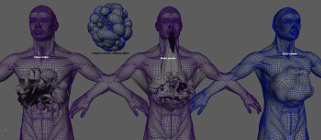
Mate is very fast, multithreaded mesh to mesh driving deformer that
produces significantly better results compared to other solutions.
The deformer uses low resolution driver mesh to control one or more
high-resolution target ones, while automatically preserve detail and
volume.
It is designed to create high quality organic deformations without much
work for the user.
Even the driver mesh has bad topology and deformations, Mate will auto-correct that and produce the best possible result.
Credit goes to Simon Yuen for the original idea and heavy contribution to the development and testing process.
|
 |
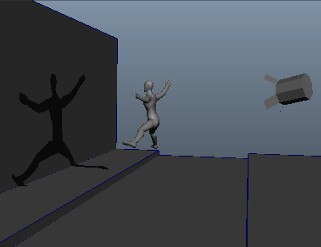
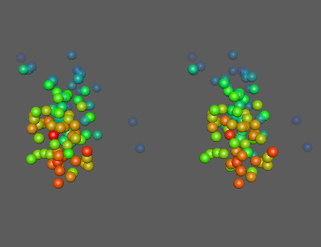
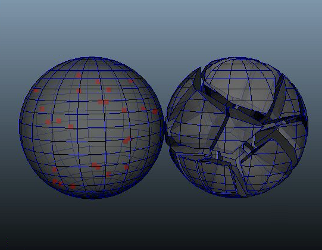
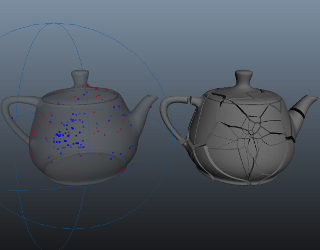
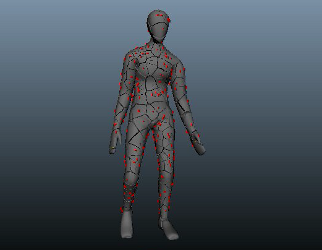
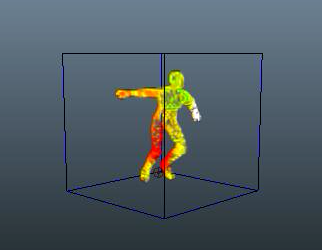
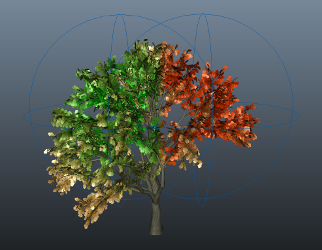
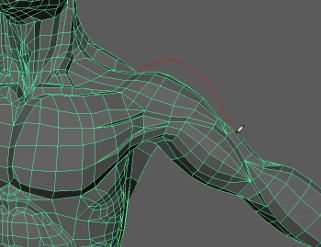
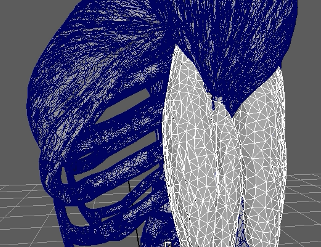
Comparison between Mate and Wrap.
Comparison between Mate and Wrap+DeltaMush.
Pay attention to the armpit (front view) and elbow (side view) areas.
|
|
nCacheInterpolator
The main application of this node is to interpolate nCache data over time (particles, fluids, mesh geometry), but it is not limited to just that. It can be used on any array, or dynamic arrays structure.
|
|
Playback of time-scaled nCache. On the left is what the standard nCache produces, on the right is what nCacheInterpolator does. Despite the changing point count over time, the result is smooth and predictable.
|
Maya's nCache can interpolate pretty well fluids cache with consistent voxel count over time. This example and the related to it scene, showcase how any array data can be time-interpolated. In this case the arrays are read from the nCache node, but they can come from anywhere.
On the left side is the original fluid animation (40 frames). On the right side is the nCacheInterpolator time-scaling it 200% - effectively blending the density, velocity, etc. arrays.
|
|
|
|
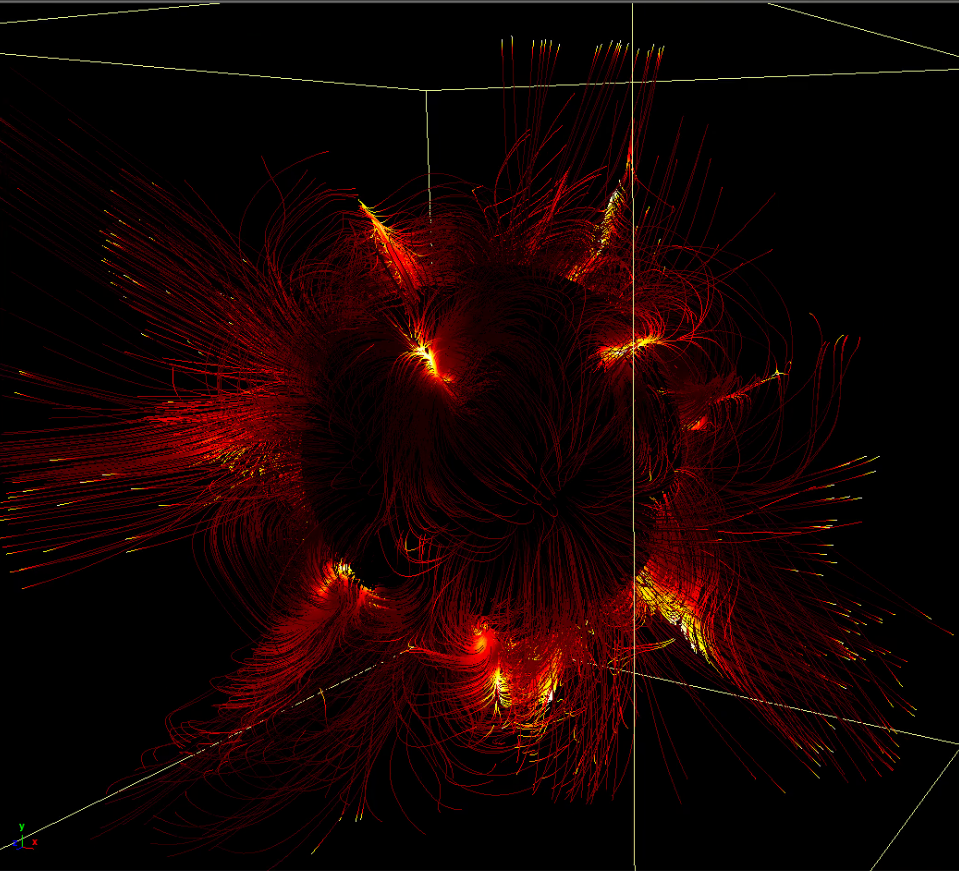
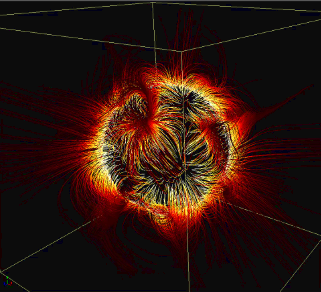
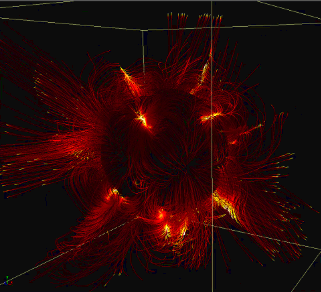
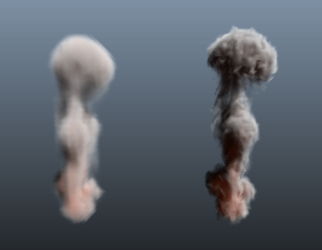
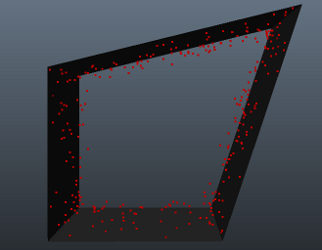
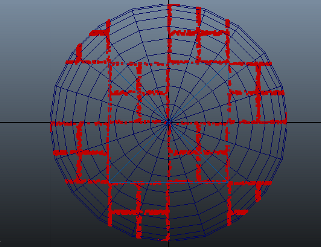
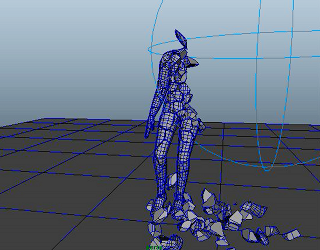
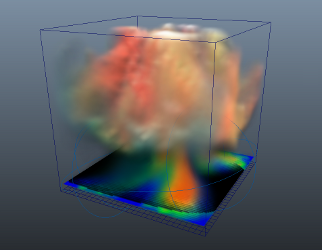
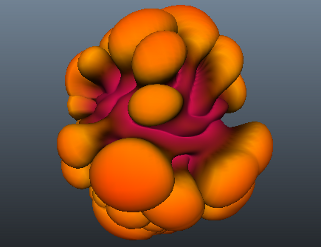
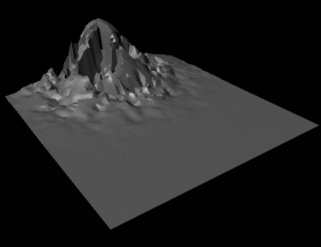
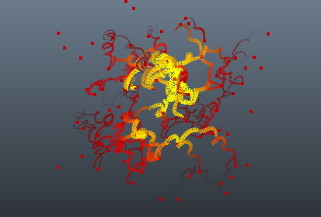
magnetic fields
Intelligent mesh generator rebuilds missing components to mend holes in geometry.
The new mesh patch conforms as closely as possible to the original subdivisions and can be further smoothed to produce seamless results.
|
|
|
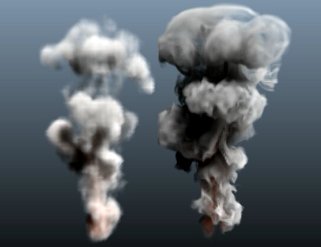
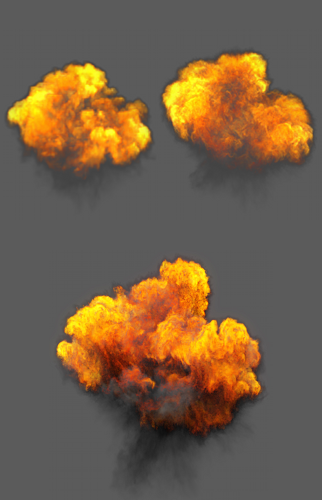
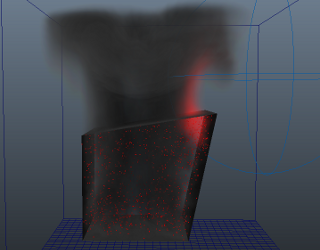
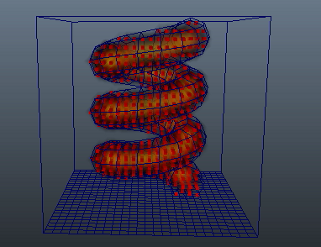
The setup leaves a lot of room for experimentation - shape, color, noise, motion frequency, etc. There is a related scene in the examples archive.
This example video outlines some aspects of the underlying nodal networks.
|
|
|
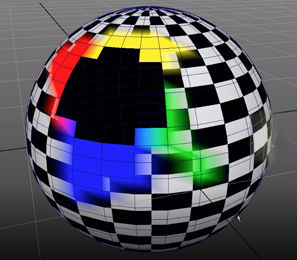
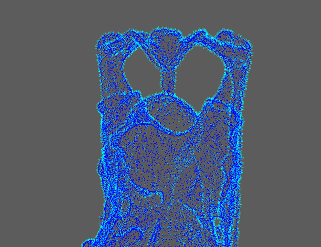
smartFillHole
Intelligent mesh generator rebuilds missing components to mend holes in geometry.
The new mesh patch conforms as closely as possible to the original subdivisions and can be further smoothed to produce seamless results.
|
|

|
SmartFillHole also considers surrounding vertex colours as well as recreates additional UVs where required. example video
|
|
|
HardMesh
A powerful
toolkit that
allows
artists to
quickly build
very complex
models using
simple input
shapes.
|
| |
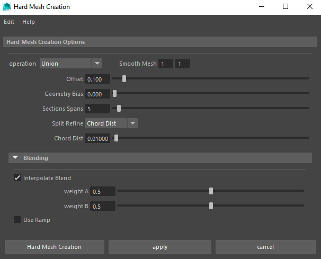
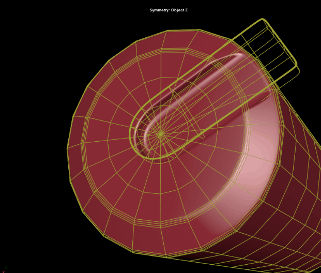
A new HardMesh
boolean is created
from two mesh
objects.
There are multiple
boolean operations to
choose from: Union,
Difference A-B,
Difference B-A,
Intersection, Panel
A-B, Panel B-A.
A live procedural
graph allows us
to modify the input
shapes at any point
later and get the changes
instantly propagated
to the final
blended boolean. |
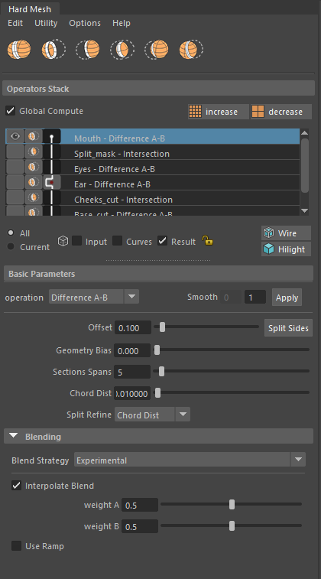
The main GUI
provides a
convenient access to
everything needed
for working with the
HardMesh system.
Existing booleans
are represented as a
stack of operators
and can be edited at
any point after
their creation.
Intuitive and
efficient workflow
is designed around a
selection sensitive
interface which displays
the related stack of
operators and
related options
whenever input shape
of a boolean is
selected in the
scene. |
|
|
|
|
upresFluid
The upresFluid node resolves some major issues in the fluids workflow of Maya by separating dynamics and resolution from the visible detail, and by implementing of wavelet turbulence algorithm (based on Theodore Kim and Nils Thuerey's open source library) for additional details as a post process.
Fluid dynamic simulation strictly depends on the container resolution. If we change the resolution the fluid will behave differently. This is not good in production because as we design our fluid, we want to use low resolutions for fast turnarounds while working out the dynamics. But later, when we have figured out the dynamic aspect and start tweaking the look of the fluid, we often want to increase the resolution to get more detail (or the opposite) and often have to start again, tweaking the simulation to accomodate for the new resolution.
The upresFluid node effectively eliminates the dependency between resolution/simulation and shading/look. For this purpose we use two containers. In the first one we focus on the fluid motion. There we can keep changing the fluid resolution in order to to achieve the best motion, without worrying about the shading part. Once we are happy with that we focus on the second container used as a static display driver for shading and rendering purposes.
The best part of all this is the comes from the ability to change the resolution of the display container on the fly - at any point. It will inherit the basic data from the source container and will interpolate it to fit its own resolution set by the upresFluid node.
As a finale we can turn on the wavelet turbulence feature to add plenty of additional detail that is impossible or at least extremely hard to achieve otherwise.
* The current version does not fully support auto-resizing of fluids.
video tutorial |
|
cage
Tracks which faces of one mesh
object are inside another object. |
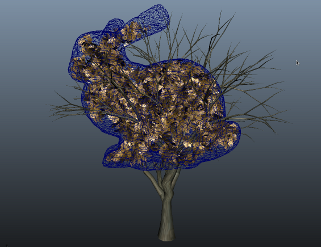 |
Cage node builds a list of
faces from the tree crown that are
outside the moving rabbit.
The list is then piped into
a deleteComponent node for procedural deletion.
As a result the leaves outside the ribbit object
are deleted.
|
|
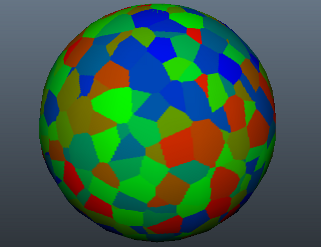
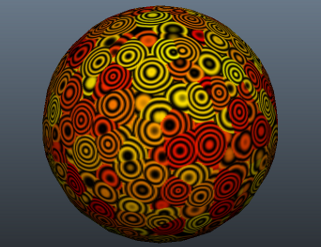
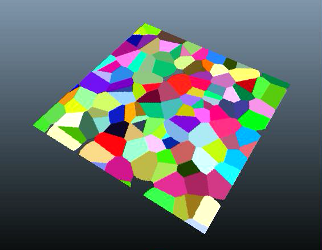
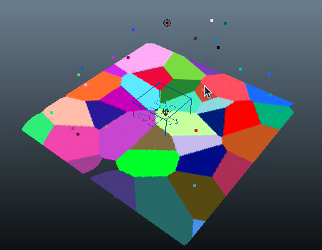
voronoiTexture3D
A
procedural 3D texture node
generating voronoi patterns.
|
|
|
|
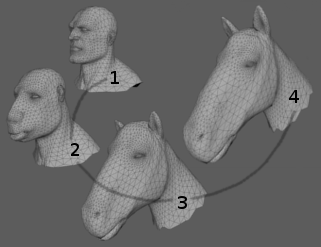
retarget
Transfers the shape of one object
relatively to another based
while trying to preserve as
much as possible the
original shape, relative to
the form of the target
object. There are multiple built-in methods that solve many general and specific cases. The node can be used as a standard or "relative" wrap deformer, uvBlendShaper, or mixture of both. |
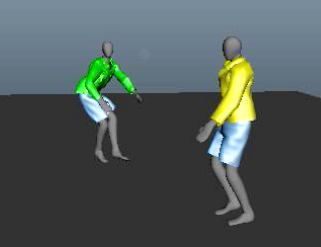 |
On the example video the yellow shirt and blue pants on the walking character are cloth sim. The green shirt and blue pants on the dancingmodel are basically the same cloth motion but relativelly transfered to accommodate for the different body motion.
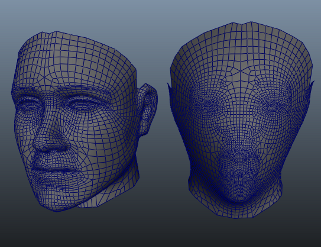
The retarget node can be
used for transferring of
facial blend targets between
two heads with different
topology and proportions,
while preserving the
sculpted details. |
|
smooth / smoothSimple
Smooths mesh
objects using Laplacian algorithm.
Provided are options for boundary
and volume preservation.
SmoothSimple is a derivative
of the smooth deformer that
trades some of
computationally expensive features
for extra speed. |
|
The example videos show
different modes of the
smooth deformer:
- basic smoothing
- boundary preservation
- fast volume preservation
- advanced volume
preservation
example video 2
example video
3
example video
4 |
|
pfxToArray
Maya PaintFX is very powerful L-System but lacks the ability to instance custom geometry to its elements. To fill the gap we can use pfxToArray node to extract the paintFX data for further modification and custom usage.
In the first video we selectively read subsets of points.
In the second video, we pipe the extracted data into geometry instancer using arrayToDynamicArray nodes.
|
|
|
|
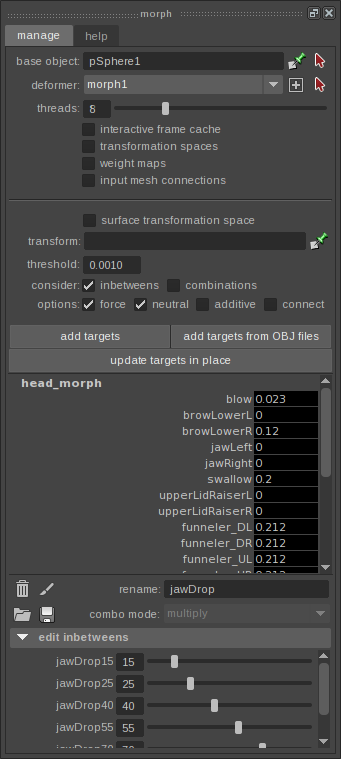 |
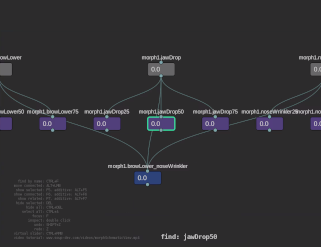
morph
Morph is fast, multithreaded and memory efficient blend shape
deformer that can handle thousands of targets with ease and without degrading performance.
It can be used for pre-deformation blend shapes and post-deformation corrective shapes.
Key features:
- Fast, multithreaded computation
- Primary, inbetween and combination targets
- Interactive per-frame caching for even better performance
- Per-target world, dag_node and surface transformation spaces
- Per-target inMesh connections
- Paintable target weights
- Comprehensive PythonAPI
- Streamlined GUI
Kwai Bun provided excellent videos showcasing some of the main Morph features:
video tutorial - general workflow
video tutorial - procedural modifiers
video tutorial - performance
video tutorial - schematic
view, targets inspector,
debug mode
 |
|
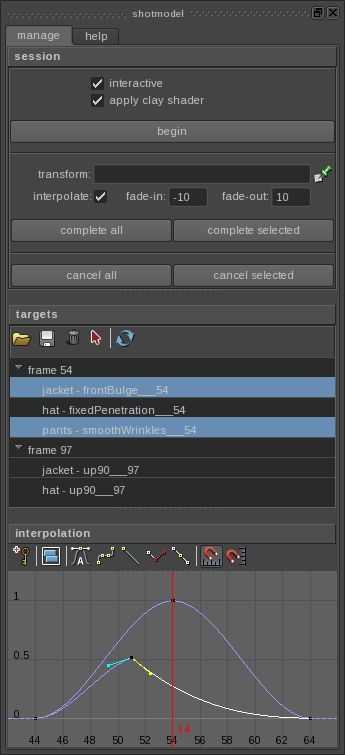 |
shotmodel
Shot-modeling is important part of every
project that involves character animation.
For complex character shows, it often becomes
one of the most important pivots in production.
This GUI and the underlying API are designed
to simplify and streamline the shot-modeling
workflow from both artistic and pipeline
standpoints. |
|
|
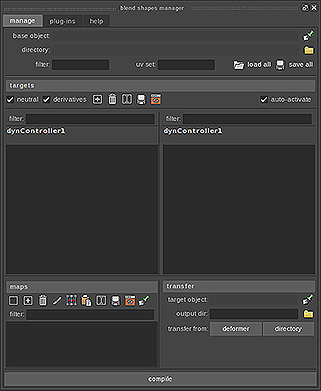
BlendShapesManager
A whole new approach to working with blend shapes.
This is a comprehensive toolset that can handle huge amount of blend shapes with ease.
Key features:
- Loading/saving of targets and split maps to/from disk
-
Inverse targets
-
Auto-generation of "derivatives" for combinations
-
Targets presented in 2 sections - primaries,
inbetweens and combinations
- Flexible workflow with hotkeys and mouse actions via overloaded Maya widgets
-
Associate split maps at any time to any targets
-
Powerful tools for transferring of targets between objects with different shape and topology
-
Compile data and bake it to a Morph deformer for high-performance
-
Complete Python API
-
Plug-in API for seamless integration of custom tools and into existing pipeline
video tutorial
|
|
scatter
Generate points on the
surface and/or inside a
deforming mesh object. |
| |
Scattered points on the surface and
inside a mesh object. |
Masked areas. Weight maps can be painted or generated
procedurally by
other SOuP nodes. |
|
|
|
Generate points within a
distance from the geometry
surface. |
Emit fluid from the
scattered points. Alter the
emission properties using
attributeTransfer and
bounding objects. |
|
|
|
scatter + projectors
Using texture based distribution we can precisely shape the scattered points in many different ways, including "boolean" operations from multiple projection planes, textures and UV Sets.
As you may know already the scatter node can be used to directly drive particles, geometry instancers and procedural shatter nodes. With the texture based distribution we gain complete control over the scattered points and in this way over the mentioned above systems.
|
| |
Planar projection. |
Boolean between
different projections. |
|
|
|
Boolean + texture masking (two checker
textures). |
Source geometry uv based. |
|
|
|
Basic example
showing instancing
of "sprites" to
scattered point
cloud on the surface
(left) and inside an
object (right). |

Scatter nodes
can be used to drive
particles in a
procedural manner.
This way you don't
have to rely on
dynamic simulation
which is very useful
in many cases. |
|
|
|
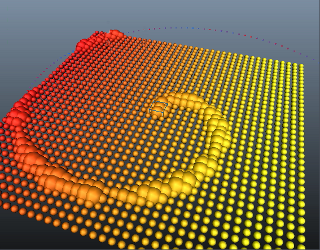
The scatter node has inPositionPP attribute that can be used to supply custom point cloud to it and in this way to bypass the generation of
randomly placed points internally. Many interesting effects can be achieved by supplying vertices, particles, voxel or pfx data to the scatter node for post-processing - for example - uniform filling of objects (as shown here).
The associated
distance to surface
data for each point
controls the color
of the emitted
fluid. Yellow to the
center of the spiral
and dark towards its
edges. |
Fill any mesh
object with
uniformly generated
grid of points by using
a combination of
SOuP nodes, inluding
a scatter one. This
structure is then used
to emit into a
fluid container. |
|
|
|
shatter
Breaks static/deforming mesh
objects on solid or surface
shards.
The node relies on input point cloud generated by scatter node, particles or nurbs curve.
Voronoi cells get calculated and geometry is cut on the boundaries. |
| |
Multiple parameters
are animated over
time - number of
points, distance
between shards,
geometry resolution
of the sphere. |
AttributeTransfer and bounding object nodes influence the positions of the scattered points. The red points
represent the original point cloud, the blue ones are the post modified
one. |
|
|
|
Shattering of
deforming geometry.
Notice how the
shards stick to
their relative
positions by caching
the input point
cloud coming from
the scatter node.
Look for the "bake"
button inside the
node's AE. |
A more complex
example involing
shattering of
deforming mesh
geometry, rigid body
simulation and
procedural control
over dynamic
constraints. |
|
|
|

Scatter points
inside a box.
Shatter the box
accordingly. Turn
the shards into
nMesh. Apply
nConstraint to hold
them together. Use
attributeTransfer
and bounding object
to control the
constraint's
per-point weights. |
To grow the
number of shards
(cracks) over time:
Split the data flow
in two separate
streams and combine
them at the end.
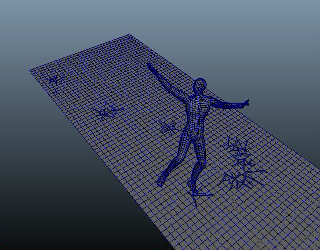
First stream is used to remove all ground faces that do not interact with the dancing character.
The second stream is used to generate scatter mask (point colors) so we get points only where the character touches the ground.
Plug the scattered point cloud and the remaining faces into a shatter node to get the desired result. |
|
|
|
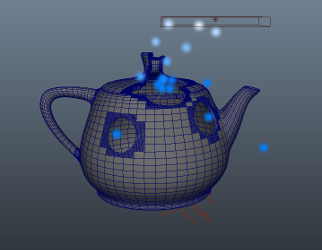
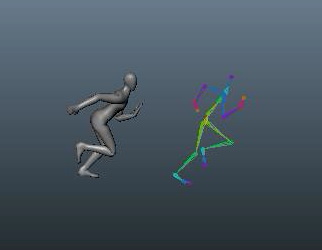
computeVelocity
Calculates point velocities
of topologically consistent
(over time) geometry. |
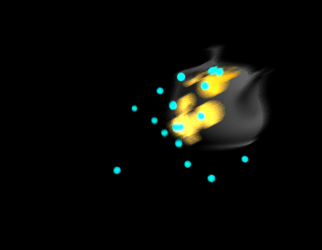 |
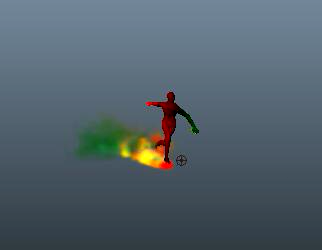
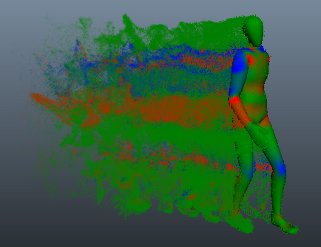
ComputeVelocity calculates point velocities of the dancing character and stores them in array. ArrayToPointColor converts this array to point colors. AttributeTransfer transfers colors from character to ground plane (hidden here) based on proximity between their points. PointCloudFluidEmitter emits fluid properties only from the area where character contacts the ground, and the fluid is colored accordingly.
ComputeVelocity calculates the velocity vectors of each point of the geometry before it gets modified (the original moving teapot). AttributeTransfer node transfers these values to the final geometry, so even the point count changes over time we still get consistent motion vectors. Using the remapArray node we post-modify the velocity data. The velocity vector array gets converted to a set of pointColors by the arrayToPointColors node and in this particular case it is named "velocity". Finally the modified teapot mesh's attribute "motionVectorColorSet" points to that "velocity" colorSet and passes it directly to the render. |
|
group
Generates lists of
components (points, edges,
faces, uvs, etc) based on
different rules. The created
data can limit the scope of
work for other nodes like
deformers, modifiers, etc. |

 |
How to render changing point count geometry with proper motion blur? Easy.
In this example we have particles falling over moving teapot. BoundingObject is passing the particle positions and radiuses to group node. The group node collects the face ids around the contact points where particles collide with the teapot surface.
This componentsList gets passed to polySmoothMesh and deleteComponent nodes.
The polySmoothMesh subdivides the faces to get more resolution, so when the deleteComponent node does its thing we get round holes.
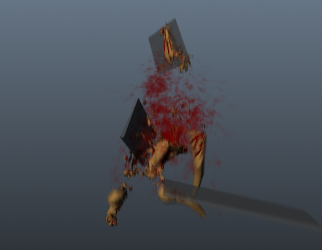
How to render changing point count geometry with proper motion blur? Part 2.
This is a more involving version of the example above. In addition to everything from the teapot setup, here we have group nodes that collect the boundary faces of the tearing surfaces. They pass the inverted componentsLists to deleteComponent nodes that are plugged to separate meshShapes - so we always get the boundary faces no matter what is happening to the upstream geometry. Then we emit particles from these faces. This way we get blood particles only where and when the geometry gets torn. Using this simple approach we can eliminate a lot of tedious work by hand needed to ensure proper particle emission from the right place and at the right time.
Notice how even the point count and
order changes over time, we
still get everything
properly motion blurred.
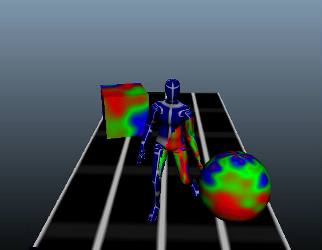
Component texture attachments in Maya are based on object groups. Using the group node we can control interactivelly that otherwise implicit system.
In this example we have a ramp texture with cranked up noise attribute assigned to couple of objects. There is a character walking around them that has a different texture assigned. Based on proximity we "transfer" the ramp texture from different objects to the character geometry. |
|
interactive caching system (ICS)
The interactive caching system (ICS)
is designed to improve
perofrmance by minimizing
unnecessary computations
when working with deforming geometry with consistent point count over time. |
 |
Once applied to deforming objects it automatically begins to operate by tracking input conditions and caching internally geometry data for each frame we step on without any further intervention by the user which results in a fluid workflow.
If the input conditions don't change when we step later on the same frames dependency graph evaluation is bypassed and the internally cached data is used instead.
- In the first part of the video the raw rig performance is shown
- ICS gets applied to the rigged geometry and hooked to the rig controls
- After the first go through the frames the performance improvement is over 7 times
- One of the controls gets animation change, the frames that get affected by the modified animation curves fall back on the raw DG evaluation, but the second time we step on them things are fast again
|
|
boundingObject
This node works in
conjunction with other SOuP
operators like group,
attributeTransfer,
multiAttributeTransfer,
morph, etc.
It provides spatial
information about geometry
components needed for many
operations. |

 |
BoundingObject reads particles positionPP, rgbPP, radiusPP and feeds group and attributeTransfer nodes with them. The Group node has an option to store componentsList and objectGroup data for previous and current states (by default it considers only the current state). This data gets passed to deleteComponent node that deletes faces from the leaves geometry. AttributeTransfer node slightly attracts the leaves around each particle and recolors them (in red - all particles in this example are red). As result we get an "acid rain" effect.
Mind, there is no transparency hack or anything like that. It is all procedural geometry manipulation.
Procedurally delete geometry. Group node collects the face ids inside the bounding object and passes them to deleteComponents node.
BoundingObject in pointCloud mode reads particle positionPP and rgbPP attributes. AttributeTransfer node transfers them to the ground surface. Alpha channel is modulated by "alpha" ramp attribute located on the boundingObject node - that's how we get multiple circles around each particle. Transfering of point positions produces the "swimming" effect - each particle attracts ground points around itself. |
|
point
Accesses and manipulates points
(particles, vertices, CVs,
etc) using standard MEL
expressions. |
|
|
Point node randomizes grid points in the XZ plane and assigns to them random colors. AttributeTransfer node transfers the colors to another plane. The result is a Voronoi noise.
Here we "project" it on a flat plane, but it can be used for things like fracturing objects with complex topology. |
You can achieve the same result by simply spraying particles around. |
|
|
|
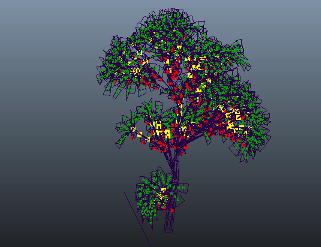
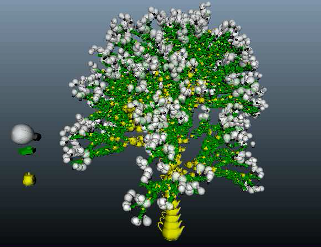
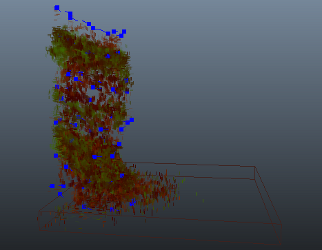
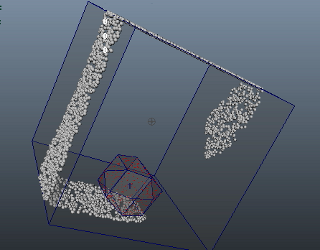
bound
Creates sparse voxel grid around
mesh geometry. |
|
|

The most
straightforward
application of the
bound node is to
generate polygonal
cage around any
mesh geometry. |
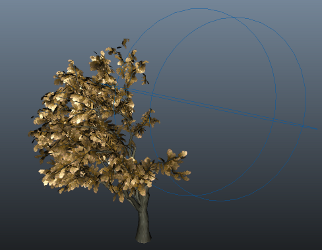
Bound nodes can be used for effortless "down-rezing" of complex objects for simulation purposes.
Example video 1 shows an out of the box simulation of the proxy geometry (1300 points) generated from the original tree (31000 points).
Example video 2 shows simulation of the original geometry. Notice the frame rates.
example video 1
example video
2
![]() |
|
|
|
componentToComponent
Converts from one component
type to another. |
 |
Convert vertices to edges
and feed them into extrude
and delete nodes. |
|
curlNoise
Dynamic field node that
implements a curl noise
funtion. Provided are many
parameters to control the
behavior of the affected
objects (particles, fluids,
rbds, etc). |
 |
CurlNoise field applied to
particles. |
|
kdTree
Implements a
space-partitioning data
structure that allows very
fast searches of points and
mapping of their attributes,
such as (positions, colors,
normals, velocities, etc). |
 |
Static high-res point cloud
is advected by
mapping its point positions
and colors to particles
influenced by a curlNoise
field. |
|
pointCloudField
Use any point cloud
(particles, vertices, CVs,
etc) and its per-point
attributes as a directional
or radial field influencing
dynamic objects (particles,
fluids, rbds, etc). Plenty
of controls are provided to
allow precise control over
the affected objects. |
 |
PolyCylinder is deformed by wave deformers and its position is animated. PointAttributeToArray node passes the point positions and tangents to pointCloudField node. The tangent vectors are interpreted as velocites and are applied to the particles. Second pointCloudField node attracts the particles around each mesh vertex so they do not escape when pushed by the first pointCloudField.
Using pointCloudFields we can use any geometry or custom arrays to control dynamic objects in ways that are hard to achieve otherwise. |
|
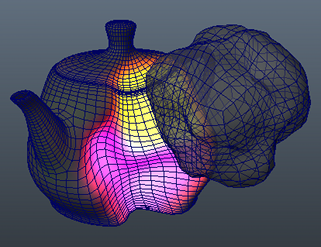
tensionMap
This node measures how much the geometry stretches or contracts,
based on different rules.
The output color map can be used
to control wrinkle, muscle,
veins, bloodflow and other
properties that are often
required for digital
characters. |
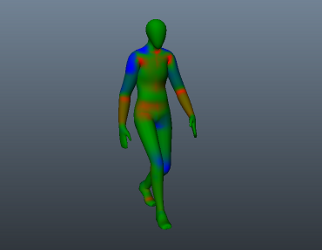 |
Common use case of
the tensionMap node - red
colors represent
compression, green is
neutral, blue is stretching. |
|
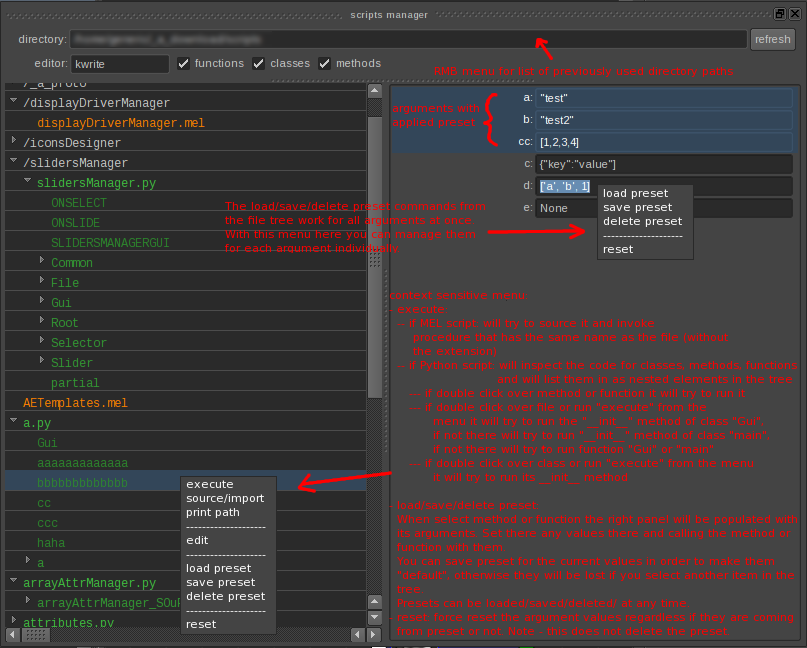
scriptsManager
Efficiently manage python and mel scripts
- execute, source/import,
edit, tweak attributes in
the UI, argument presets,
save/load parametrs, etc. |
 |
|
|
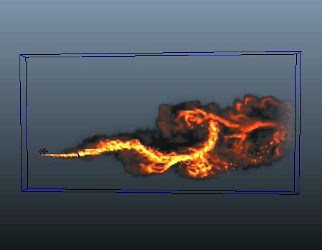
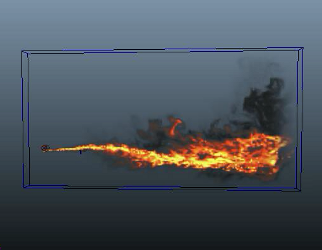
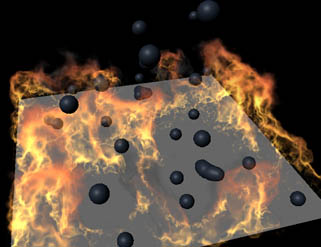
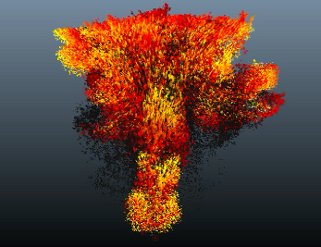
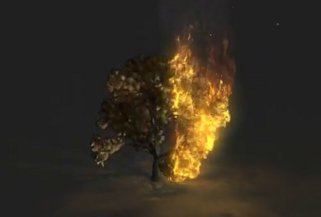
pointCloudFluidEmitter
Powerful fluid emitter that
can use as a source any
point cloud (particles,
vertices, CVs, etc). There
are plenty of options that
provide precise control over
the emission process. |
 |
Particles move through
fluidContainer,
pointCloudFluidEmitter reads
their positions and emits
fluid properties in the
voxel grid.
In this example only the
particle positions are used,
but any other attributes
such as veolicity, mass,
color, etc can be utilized
too, if needed.
In the previous example, the
fluid lacked speed once
emitted in the container. To
improve on that, in this
second version of the scene, a pointCloudField node that uses
the particle positions, radii and velocities pushed
the fluid in the desired
direction. As a result the
fluid looks a lot more like
a flamethrower.
Using this node and a bit of creative thinking
one can apply deformers to fluids much like any other geometry in Maya. |
|
textureToArray
Maps pixels to points
(particles, verties, CVs,
etc) and outputs the RGBA
channels packed inside a
double array. There is a
wide arrange of applications
for this data, such as
texture deformers, emitters,
modifiers, etc. |
 |
The standard Maya texture
based fluid emission is ok, but we
often need more precise control over what
is emitted and where. In
this example textureToArray
node converts animated ramp
texture to point colors.
AttributeTransfer node uses
boundingObject to override
the texture colors in
specific area of the
surface. In this case we do
it for colors, but it can be
anything else - density,
fuel, etc.
PointCloudFluidEmitter picks
the final colors and emits
them into the voxel grid.
Precise and flexible fluid
emission systems can be
built using similar methods. |
|
peak
Offsets points along their
normals, velocities or
custom vectors. |
| |
The peak deformer
can do miracles on
your meshed fluid
sim.
On
the left side is the meshed
sim, on the right side is the same geometry, but with
applied peak deformer. |
A simpler example with
exagerrated peak effect. |
|
| |
TextureToArray node converts animated ramp texture to point attributes (in this case - per-point weight), this weight data is passed to peak deformer. The peak deformer offsets points along their averaged normals.
Bounding object and
attributeTransfer
masks out certain
areas. |
TextureToArray
nomde feeds
weight map
extracted from a
procedural noise
texture into a peak deformer. Second peak deformers makes the blobby "mushroom" effect. AttributeTransfer adds point colors. |
|
|
|
trajectory
Non-destructively manipulates animation paths directly in the viewport. |
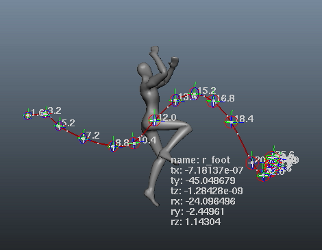 |
The trajectory animation
system in action.
Notice the additional
information displayed on
screen. There are multiple
options that can toggle
visibility of the individual
components. |
|
timeOffset
Time offset geometry
(meshes, curves, surfaces,
etc) by evaluating it
independently from the
global timeline in Maya. |
 |
Basic example where sking
clustered geometry bound to
animated skeleton is
time-shifted independently
from the underlying skeleton
motion. |
|
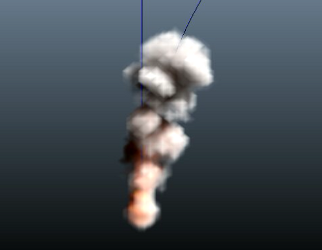
fluidAttributeToArray
Extract fluid data (density,
velocity, color, etc) and
output it as arrays. |
 |
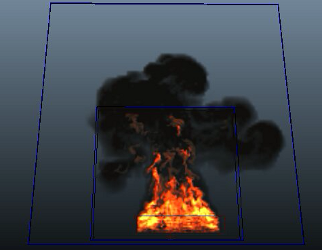
The fire component of the simulation exists in the small fluidContainer only. FluidAttributeToArray node extracts the voxel properties from there (in this case position + density only) and passes them to pointCloudFluidEmitter emitting smoke into the big fluidContainer.
Using this technique we can split the main elements of the fluid simulation (in this case - fire and smoke) between different containers for more precise and independent control over simulation and shading.
Voxelize geometry and render
it as "fog".
ComputeVelocity calculates the point velocities of the dancing character and passes them to a pointCloudFluidEmitter node in attributeTransfer mode. At each step the pointCloudFluidEmitter will empty-up the fluidContainer before emitting fluid properties, effectively transfering attributes from input pointCloud or geometry to the fluid. |
|
attributeTransfer
One of the most commonly
used nodes in SOuP. It
transfers point attrbiutes
between objects, based on
proximity. |
| |
Summer and autumn
leaves - transfer
point colors using
two bounding
objects. |
Influence the
weights of
nConstraint
applied to
nMesh. |
|
| |
Transferring point
positions from the
teapot object to a
larger sphere around
it and merging the
overlapping points
of the sphere
produces a convex
hull geometry. |
Another convex
hull example,
this time with
animated point
cloud. |
|
|
|
multiAttributeTransfer
Similar to the
attributeTransfer node it
calculates weights based on
point proximity in the
world. The node is designed
to work in conjunction with
the boundingObject one. Data
is conveniently packed as
multi-array attributes that
can directly influence the
behavior of deformers. |
 |
MultiAttributeTransfer feeds a cluster deformer with point weights based on proximity between character and ground geo. The closer they are - the stronger the weight is.
Point radius, falloff ramps and other attributes can be controlled globally for the entire set of points or through weight maps for localized control.
The cluster handle is translated on -Y - that's how we get the ground deformations. You can use the peak node to offset points in the same manner for complex geometry
(it will do it based on point normals instead of globally for the entire object like the cluster).
Similar to the example above, but in this case we "remember" the contact areas between character and ground plane. Mind, this is not the regular soft body trick - it is all procedural - no dynamic simulation involved.
MultiAttributeTransfer allows for localized control over deformer weightsMaps.
In this example we have 4 blendShape targets applied to a head geometry.
Each boundingObject is connected to multiAttributeTransfer node that controls the point weights of one of the four targets. The same result can be achieved by using attributeTransfer and arrayToMulti nodes. That's why there are two example scenes supplied. |
|
 |
Combination of point, peak, arrayDataContainer and computeVelocity nodes can produce interesting motion based deformations.
This example shows the very basic of the idea that can be easily extended to achieve much more complex and refined results. |
|
arrayDataContainer
Accumulates data over time,
effectively overcoming some
of the inherent limitations
of the DG and its evaluation
mode in regards to data
persistance. |

 |
Using arrayDataContainer nodes we can create interesting effects like wetmaps or accumulated damage. Generated data can be used to drive blendShapes and texture maps.
AttributeTransfer node transfers per-point weights from fighter
character to the static one.
This data gets passed to arrayDataContainer node and then to arrayToPointColor one. MentalRay vertexColors texture pipes it into a shading network where it is used for blending between two textures.
The arrayDataContainer node
can "sink" data over time. At each evaluation step it
decreases the stored values, creating a
disappearing "wetmap" effect.
PositionPP, radiusPP, rgbPP, weightPP get transfered from particles to the water surface. As result ripples form around every particle that hits the water. Peak deformer displaces the ripple points along Y. Also pointCloudFluidEmitter emits fluid properties from the white areas of the ripples.
Here particles transfer weight over to the nCloth meshes via the arrayDataContainer which maintains the values over time allowing fluid emission. The pointCloudFluidEmitter gets its PositionPP from a pointAttributeToArray and the inDensityPP comes from the arrayDataContainer.
Similar to the above method except the reverse is happening here with the weight transference. The emitting mesh already has a weight of one but as particles land on its surface, the contact points turn black which prevents fluid emission, hence we can "put out the fire" so to speak. |
|
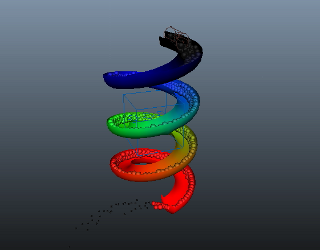
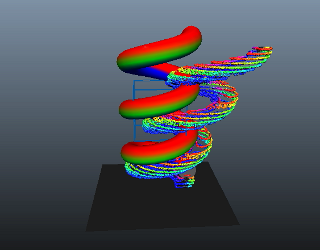
pointCloudToCurve
Constructs nurbs curve from
point cloud, where each
point becomes a curve CV. |
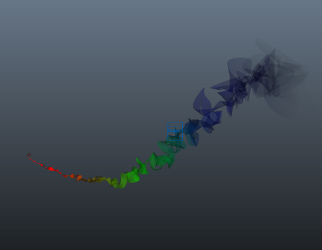 |
PointAttributeToArray nodes
extract particle positions
and map them to the idIndex
arrays. PointCloudToCurve
nodes get this data and
create nurbsCurves. Loft
node creates polygonal
surface, attributeTransfer
maps the particle colors to
the polySurface (optionally
we can transfer and velocity
for proper motion blur).
Ramp controls the opacity of
the surface along its
length. |
|
pointCloudToMultiCurve
Creates multiple curves from
properly indexed point
cloud. Live "garbage
collection", etc. |
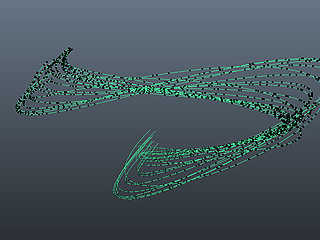 |
This image is
produced by parentID attribute of
emitted particles partitioniing
the point cloud. Data is
passed to
pointCloudToMultiCurve node
that generates multiple
nurbs curves forming
"trails" from the subsets of
points. |
|
arrayToDynArrays
Maya's geometry instancer
relies on specific data
structure that is great in
many ways and useful for
many other things too.
Unfortunatelly, it is
implemented as a black box.
This node opens it up and
provides everything needed
to control the instancing
and/or pack/unpack arbitrary
data inside it. This
approach completely
proceduralizes the workflow
which makes a huge
difference, compared to the
traditional approach of
instancing to particles
only. |
 |
The birdman example shows a procedural instancing
of feathers. Scatter node generates points randomly placed on the character's
body. AttributeTransfer nodes adjust the
feathers orientation to
match the underlying
surface.
Data gets packed and passed to the instancer by the
arrayToDynArrays node.
FluidToArray node extracts the fluid properties and passes them to few arrayToDynArrays nodes that feed an instancer node. As result we instance geometry to fluid voxels. We can map voxel properties to instances in many different ways. In this
case:
voxel density - instancer scale
voxel velocity - instancer aimDirection
If the voxel is empty (density = 0) the related instace gets hidden for better performance.
This time using 3D fluidContainer and instancing of multiple objects. If you check the example scene, pay attention to how the multiple instances get randomized using fractal texture and textureToArray node.
|
|
instanceManager
Instancing made easy! SOuP provides powerful tools for geometry instancing but the workflow is demanding. InstanceManager wraps it all in a simple GUI and straightforward workflow. |
|
|
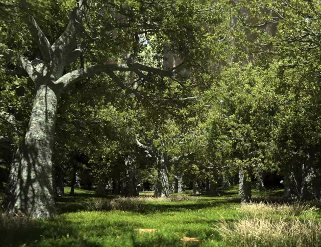
Beautiful
environment created
by Jun Eun Kim. |
Extensive video
tutorial
covering most
aspects of the
instance manager
GUI.
Many new
features have
been added to
the toolkit
after this
tutorial went
online. They are
described in the
related SOuP
release
announcements on
the community
forums. |
|
|
|

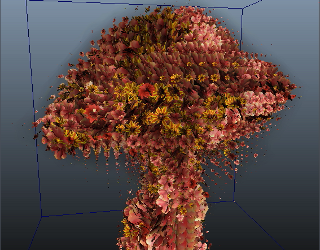
Stacked instancing is a powerful capability of the toolkit. This
functionality is covered in the last part of the video tutorial
above.
There green moss and red alien plants get instanced
on mushrooms instanced on the terrain surface. |
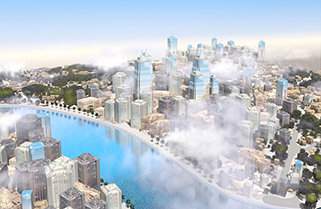
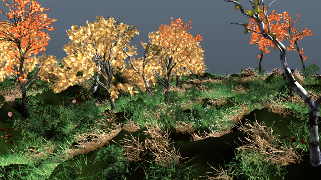
No instancing
system is
complete without
proving that it
can make a city. |
|
|
|
pyExpression
A standalone node that
seamlessly integrates Python
scripting into the Maya DG
and its evaluation model.
Local variables provide
parity with input and output
attributes. AE template
contains Python console and
extensive set of controls
that enable handling of
large number of objects with
ease. |
example video
2
example video
3
example video
4 |
The 4 example videos
showcase programmed and
procedural manipulation of
transform objects and mesh
geometry using Python code
encapsulated inside the
pyExpression node. |
|
|
particle/nParticle examples
by Sergey Tsyptsyn |
|
|
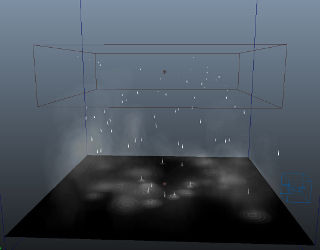
There is a simple way to turn any particle shape into a point cloud container reacting on input events. Here one particle shape influences the size of another one. |
Transfer point colors from geometry to particles.
Remember how hard it was to make particles react on surface properties from surrounding them geometry. Well, not anymore. |
|
|
|
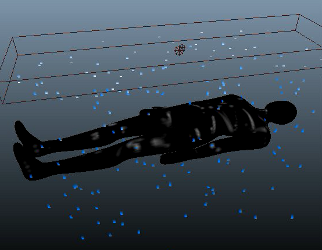
AttributeTransfer node influences the radius of particles passing through boundingObject. |
PfxToon color transfer to particles. |
|
|
|
Nucleus lacks one very useful feature we enjoyed in the old rigid body solver
- collision detection. SOuP brings it back. |
Another example of procedural control over particles from external events
- notice how the particle colors always match the animated texture of the surface underneath.
|
|
|
|
audioToArray (audio node)
Drive transform nodes, or procedural networks with data from audio files
(wav, aiff, aifc, snd, stk). Particles, fluids, geometry generation or deformation, etc.
- all they can benefit from this versatille node. |
|
|

Interpolate nurbs curve through the audio bands, feed the result into a peak deformer that offsets the points of the curve. Revolve a nurbs surface to visualize in 3D. |
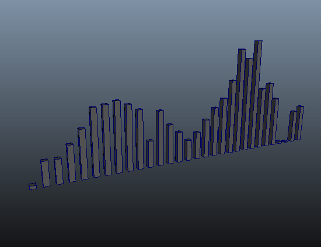
Audio bands
represented as scaling transforms. |
|
|
|
Deform polygonal sphere with audio data. Colorize vertices according to amplitude. |
|
|
|
|
mapToMesh & meshToMap
These two nodes provide the ultimate
control over UVs. Convert
them to mesh geometry, apply deformers, animate,
sculpt by hand, or
manipulate them procedurally, then convert the result back to UVs. |
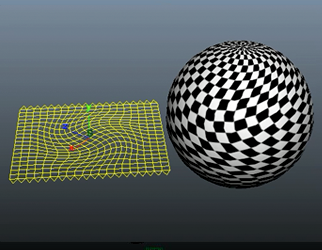 |
Sphere's UVs are converted
to mesh geometry (the yellow
plane). Soft modifier is
applied to it and rotated to
produce twisting effect. As
a second step the plane
vertices are interpreted as
UVs and applied back to the
sphere. Notice how the
applied checker texture
reacts accordingly. |
|
arrayToTexture2D
Converts (UV maps) array
data to 2D texture that can
be plugged directly into any
shading network. With this
node we can directly
influence shaders by
geometry level changes in
the scene. |
|
|
 |
 |
|
|
|
AttributeTransfer+boundingObject generate
point weight map. ArrayToTexture2D converts
it to texture
modulating a
procedural noise
applied to the
displacement channel
of the shader. |
|
|
|
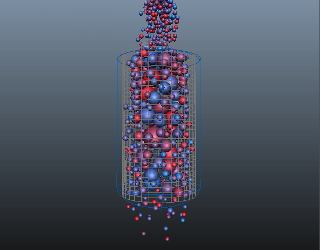
pointCloudParticleEmitter
This node can use any point cloud
(particles, vertices, CVs,
vector array, etc) as an
emission source. It directly propagates rate, position, velocity, mass, lifespan, radius, rotation, color, opacity, 5 user scalar and 5 user vector attributes - all inherited from the input
point cloud data. There are
plenty of parameters that
control the emission
behavior. |
|
|
Control particle emission using bounding object. Vertex normals are used as velocity
vectors for the new
particles. Particles inherit the vertex colors. |
Particle emission from mesh surface with color inheritance. |
|
|
|
Emit particles from fluid voxel grid. Particles inherit voxel velocities. Voxel densities controls emission rate. Voxel densities are piped to the particles as userScalar1PP attribute that controls ramp attached to the rgbPP attribute - that way we recolor particles according to the densities. |
Making force shield effects is
now trivial. |
|
|
|
slidersManager
Easily create and manager large number of animation sliders and selectors.
These objects can be used to control any element or group of elements in your scene. Facial animators often use similar tools to streamline their workflow. This tool adds lots of additional features and flexibility. For more information read the help tab. |
|
|
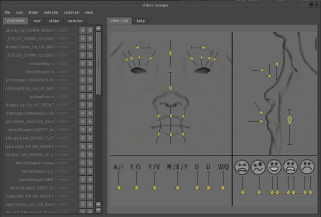
Example setup for
simple facial rig. |

Included is a "takes" system that allows
artists to
capture
"snapshots" of
all/selected
sliders and
apply them back
partially or
fully. |
|
|
|
bmesh
zSpheres implementation in
Maya. Credit goes to Michael
Tuttle for sharing his
prototype, based on Justin Ardini's open source project (http://justinardini.com/),
which became the basis of
this work. Source code is included in the
downloadable SOuP archive. |
 |
Video tutorial outlining the
main concepts and basic
workflow.
The bmesh system can be
useful in many cases, such
as making of low-res proxy
geometry for animation, or
dynamic colliders, as well
as a starting point for
character modelling. |
|
|
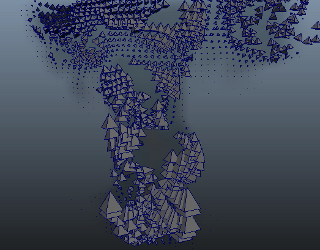
various examples |
|
|
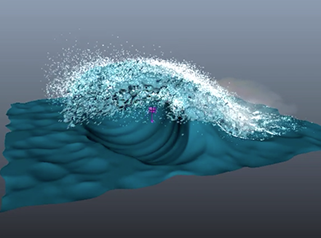
Combining point cloud FX emission with peak deformer and Maya's standard cluster, ideal for hero wave FX, can be achieved at the fraction of the time it takes to run a bifrost simulation. |
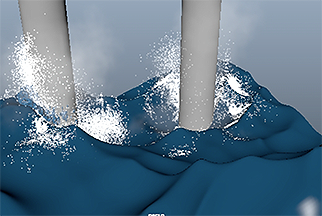
Similar to the
example on the
left, except now SOuP
nodes are used to immitate mesh collisions.
In addition, the pointCloudField uses a subset of mesh points to drive the
particle/fluid emissions along the vertex velocities of the wave mesh. The particles then have the luxury of resting on the ocean surface when not in range of the pointCloudField. |
|
|
|
Interesting example combining group and delete nodes
controlling particle
and fluid emission, by Jeremy Raven. |
|
|
|
|
shell
This node has two main
modes:
- extract per-shell data -
points, normals, colors,
weights, radii, component
ids, bounding box, etc. and
pack the data into output
arrays;
- control mesh shells with point cloud
and its per-point attributes supplied on the input by remapping
them to the corresponding
mesh shell; |
 |
Multiple mesh shells within
a single mesh object get
controlled by procedurally
animated points.
Each point of the point
cloud controls position,
scale and color of a
corresponding shell. |
|
cocoon
Draw connections between
points based on their
proximity. Links can be
represented as openGL lines
in the viewport, instanced
geometry, or live editable
mesh. Extensive set of
controls provide complete
control over all aspects of
the link's appearance, such
as color, opacity,
thickness, curvature, etc. |
|
|
Create dashed lines
by varying the links
thickness along
their length. |

Basic example
showing color
inheritance from
the input point
cloud and
blending the
colors along the
links length. |
|
|
|
Applied "gravity"
changes the shape of
the links between
their start and end
points. |
|
|
|
|
|
|
tensionBlendShape
Blend between different targets based on surface tension. |
 |
Workflow is as simple as it
gets. The provided example
video shows how the node
reacts to manual user input
from soft-selection.
Behavior is the same when
the geometry is animated by
deformers, or other
procedural methos. |
|
stickyCurve / stickyLips
A generic node that can
directly controls wire
deformer(s), or individual
nurbs curves. It can be used
for many things, but the
most common case is "sticky
lips". |
Basic "sticky lips"
deformation effect. |
Many "sticky lips" setups
often end-up being a buzzy network of nodes, constraints, expressions, deformers, etc.
Our solution simplifies
everything to just one node
that takes care of all involved complexities. As a result,
technical artists have one
thing less to worry about
and the DG performance gets
significantly better.
Simple Python API allows an easy integration into any scripted rigging systems.
Included is GUI that streamlines the interactive workflow. |
|
tensionMapSimple
Similar to the tensionMap node, but in this case tension is
calculated for user defined
pairs of points only. Each tension value can be remapped by corresponding ramp. Included are additional options for
min/max limits, absolute values, etc. |
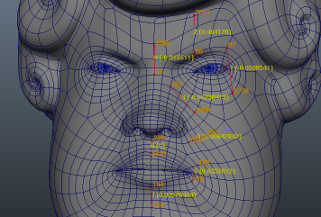 |
The most common use case is
to control pre-made ramps,
carefully crafted weight /
wrinkle / bloodflow maps and
shaders, as well as other
nodes and deformers. Artists
familiar with comprehensive
facial setups will
appreciate the capabilities
this node brings to the
table.
The provided screenshot
shows a face rig with
multiple tension pairs that
will drive manually painted
weight masks splitting
extracted wrinkle map (from
high-res sculpt) as
individual regions that
react to the animated face
deformations. |
|
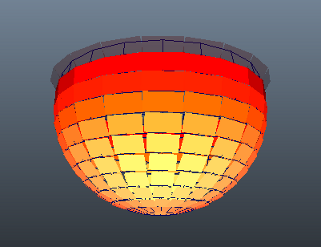
voxelGrid
Creates dense/uniform voxel
grid around mesh object. In
combination with
pointsOnMeshInfo the voxel
grid can be sparsed. With
other words - voxels located
further away from the mesh
object's surface than given
distance threshold get
discarded. The remaining
voxels can inherit normals,
colors, UVs, and other
properties from the
underlying mesh geometry. |
example video
2 |
Multiple capabilities
of the voxelGrid in
conjunction with other SOuP
nodes. |
|
copier
Powerful and versatile node that copy-stamps mesh geometry
onto the points of a point
cloud (vector array,
particles, vertices, CVs,
etc). It supports per-instance time
offset, control over vertex colors,
UVs, soft/hard edges, shader attachments,
normals, scale, etc. A key
feature is the ability to
override any node.attribute
from the upstream graph of
the input mesh objects.
Output can be a single
editable mesh object, or
instanced geometry, or both. |
|
|
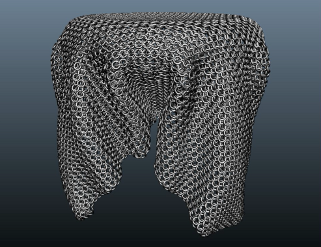
Turning any mesh
geometry into a
chainmal, knitted
fabric, etc, is now
trivial. |

Simple crowd
simulation -
single character
rig with walk
animation cycle
is instanced
with time-shift
onto points
sliding on mesh
surface. |
|
|
|
Basic motion
graphics element. |
Video tutorial
outlining the
basic workflow
and main
concepts of the
copier node. |
|
|
|
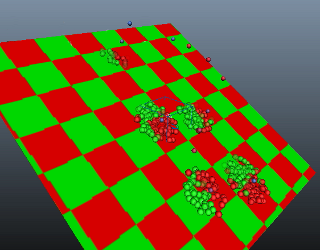
mesh2arrays
Very useful node provided by
Alex Smolenchuk. It performs
uniform scattering of points
on mesh objects. The
generated point cloud can
inherit normals, colors,
UVs, etc properties from the
underlying surface. |
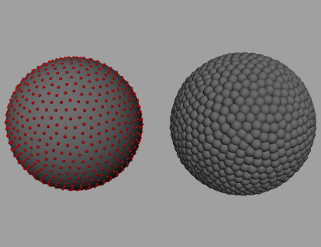 |
Uniform point cloud
distribution. |
|
contour
Shape the silhouette of mesh
objects in camera space
using intuitive and effortless
workflow. |
 |
The brush interface in action. |
|
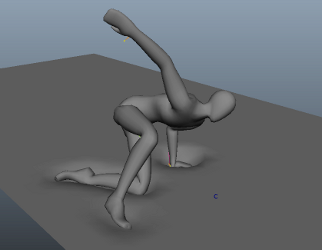
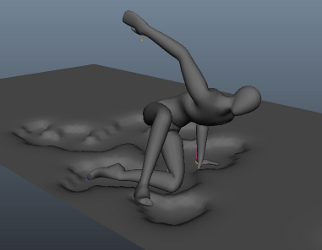
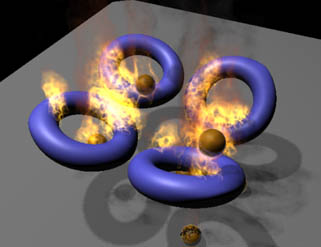
collide
A powerful
deformer and based on in
toolset for geometry collisions.
Key features:
- High-quality collisions and bulging
- Speed - extra care was taken to ensure maximum performance in every case
- Complete control over every aspect of the workflow - global settings, per-deformed object overrides, per-collision object per-deformed objects overrides, list goes on
- Tight integration with the rest of SOuP nodes - normal/membership/weightmap modifiers, etc
- Well structured UI makes all features convenient and easy to use |
|
|
One-to-one
comparision between
Maya's sculpt
deformer, Maya
Muscle and SOuP's
collide. Result is
self-explanatory.
|
Basic example
produced by
using the bulge
functionality of
the collide
deformer. |
|
Base workflow and
main concepts:
video tutorial 1
video tutorial 2 |
|
|
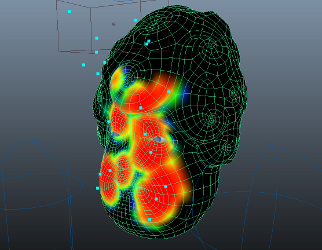
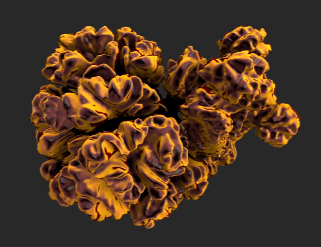
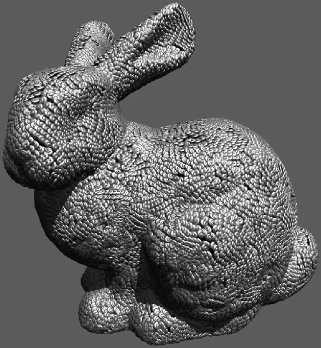
reactionDiffusion
Generates organic patterns on the surface, or inside the volume of
a mesh object. |
 |
Video tutorial outlining the
main concepts and basic
workflow. |
|
pointCloudBuilder
Generates organic patterns on the surface, or inside the volume of
a mesh object. |
 |
Video tutorial outlining the
main concepts and basic
workflow. |
|
smartConnect
Highly efficient,
comprehensive and flexible
connection editor that
significantly improves on
how artists work with nodes,
connections and more. |
 |
Video tutorial outlining the
main concepts and basic
workflow. |
|
resolveSelfIntersections
Resolves mesh
self-intersections.
This
video tutorial
shows the base workflow. |
|
shortestPath
Finds and constructs the
shortest path between mesh
vertices. |
|
|
Uniform growth. |
Non-uniform growth. |
|
video tutorial
- workflow and interactive
toolset. |
|
tiles
Quickly and effortlesly create and modify tiled geometry.
This toolset provides all the bells and whistles
for dealing with tiles - fully procedural, decoupled tiles from grids, randomize position/rotation/UVs, conform to a non-flat walls, "cutters", Python API, etc,. |
 |
Video tutorial outlining the
main concepts and basic
workflow. |
|
meshFitting
Powerful solver and flexible
toolset built around it
provide us with the ability
to deform any given mesh to
closely approximate (fit)
the input geometry,
regardless of their
topology.
|
|
|
|
solver
Iterate on just any data set and accumulate the results over multiple evaluation steps of the dependency graph.
|
|
|
Solver + group +
extrude. |
Solver + goup +
extrude + colliders. |
|
|
|
Solver + resample +
resolvePointCollisions.
Solving on a plane. |
Solver + resample +
resolvePointCollisions.
Solving in 3D. |
|
|
|
Organic growth
achieved on an
arbitrary mesh
surface. |
Peter Larson shared
here
some of his tests
with the solver
node. |
|
|
|
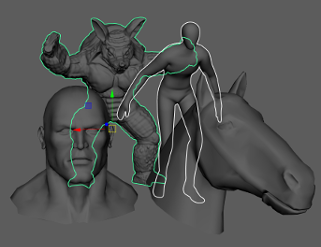
editComponentsList
Simple, yet very powerful tool for hard-surface modeling. Provides the ability to adjust the affected components (vertices, edges, faces, CVs, etc) of the applied geometry modifiers at any stage of the modeling process. Think about it as a hands-on-procedural modeling workflow. |
 |
Video tutorial outlining the
main concepts and common
workflow. |
|
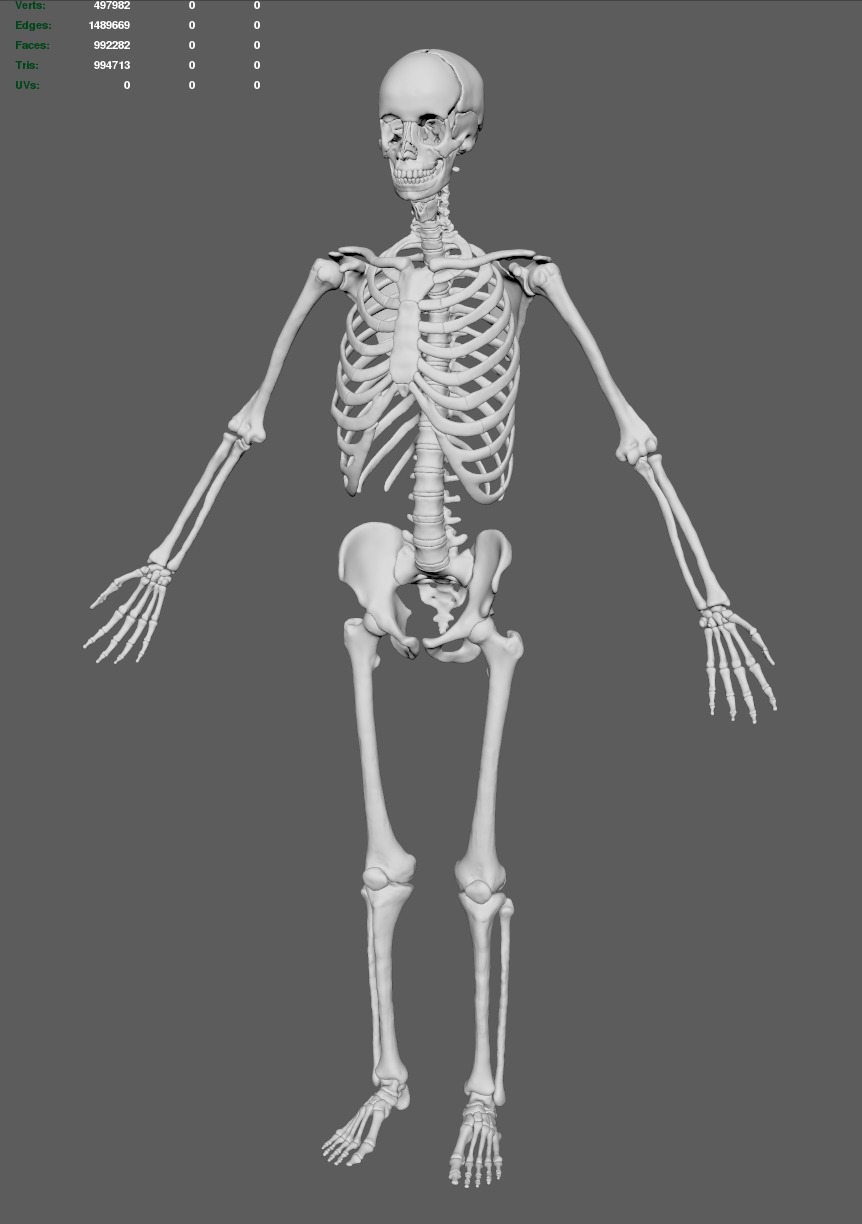
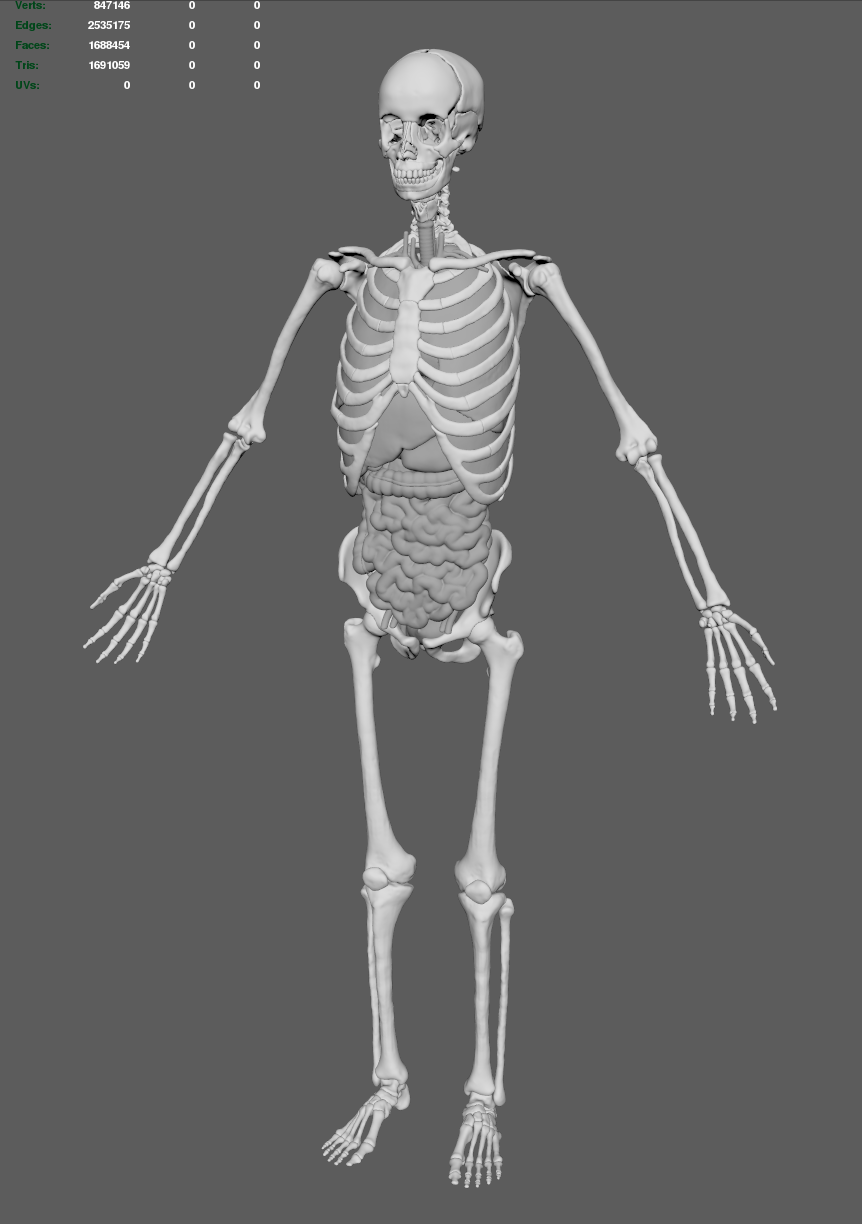
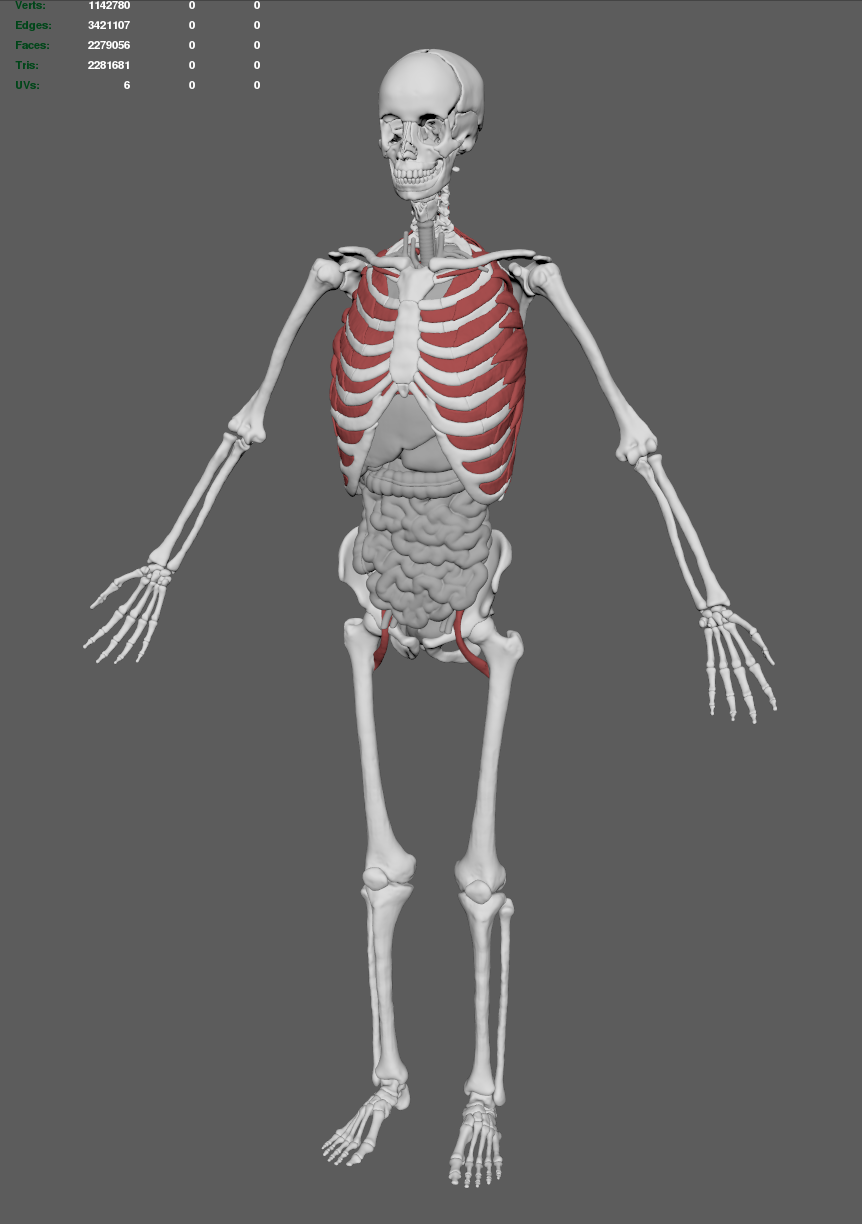
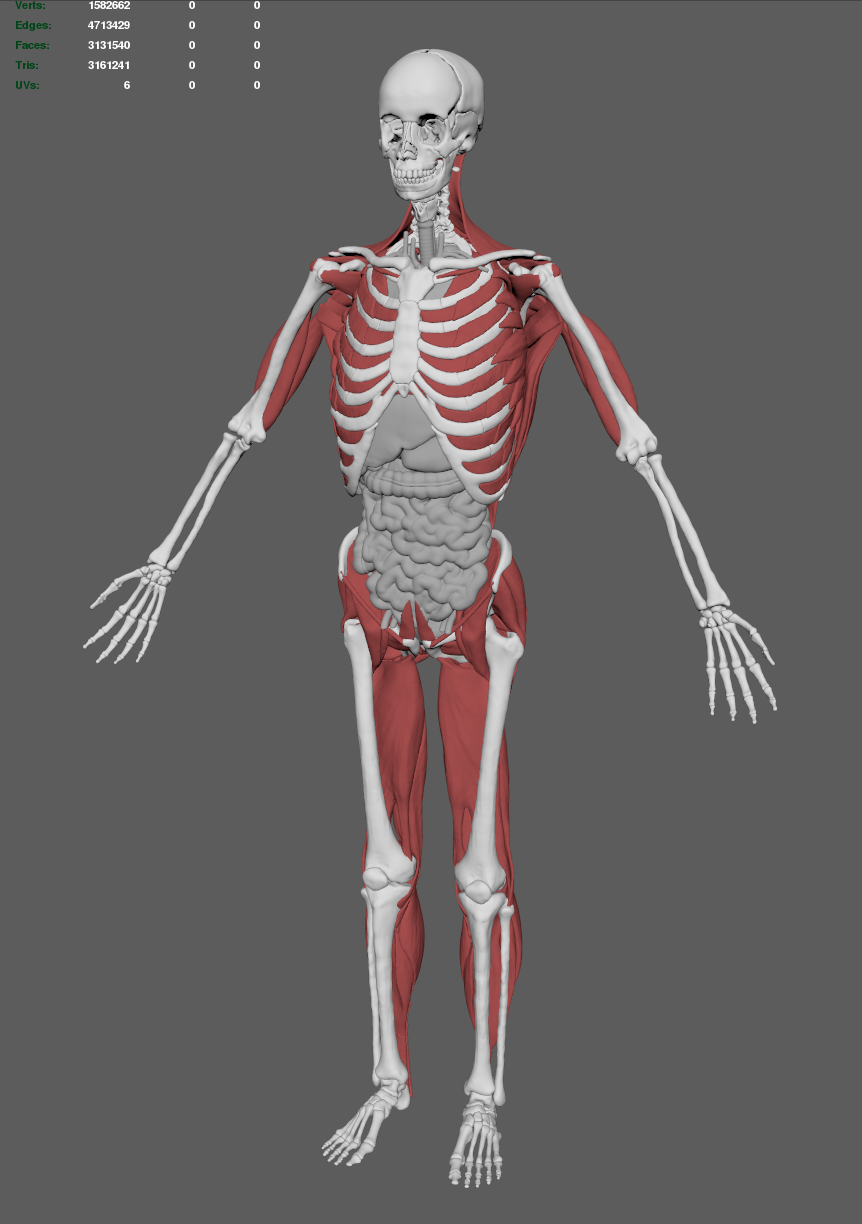
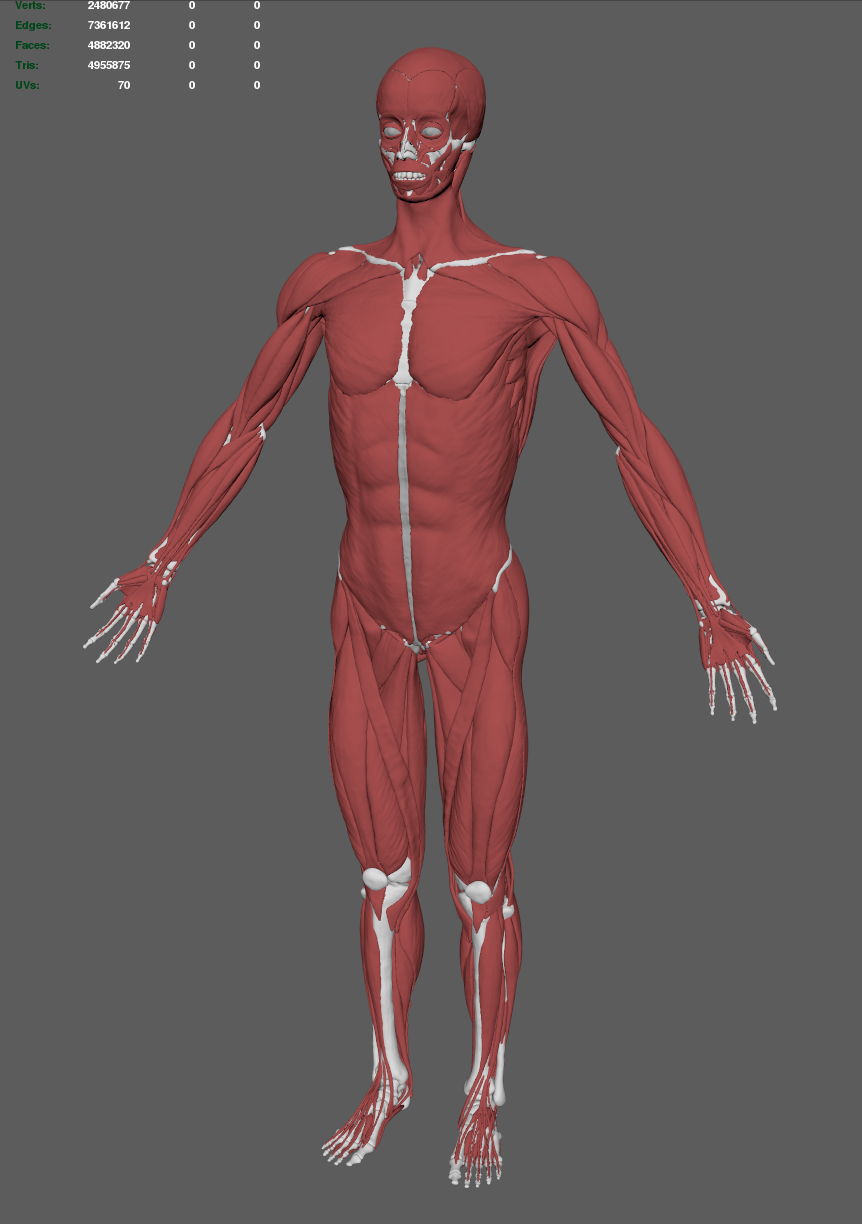
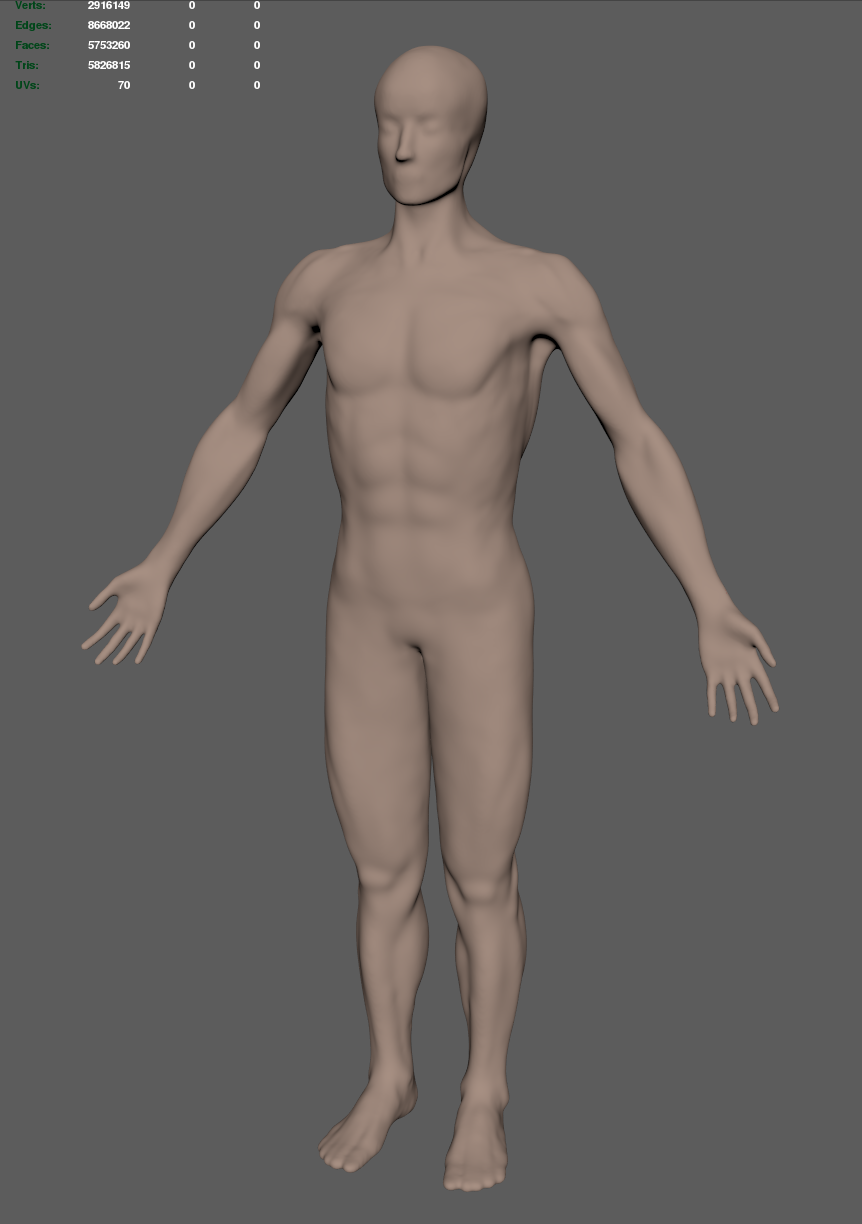
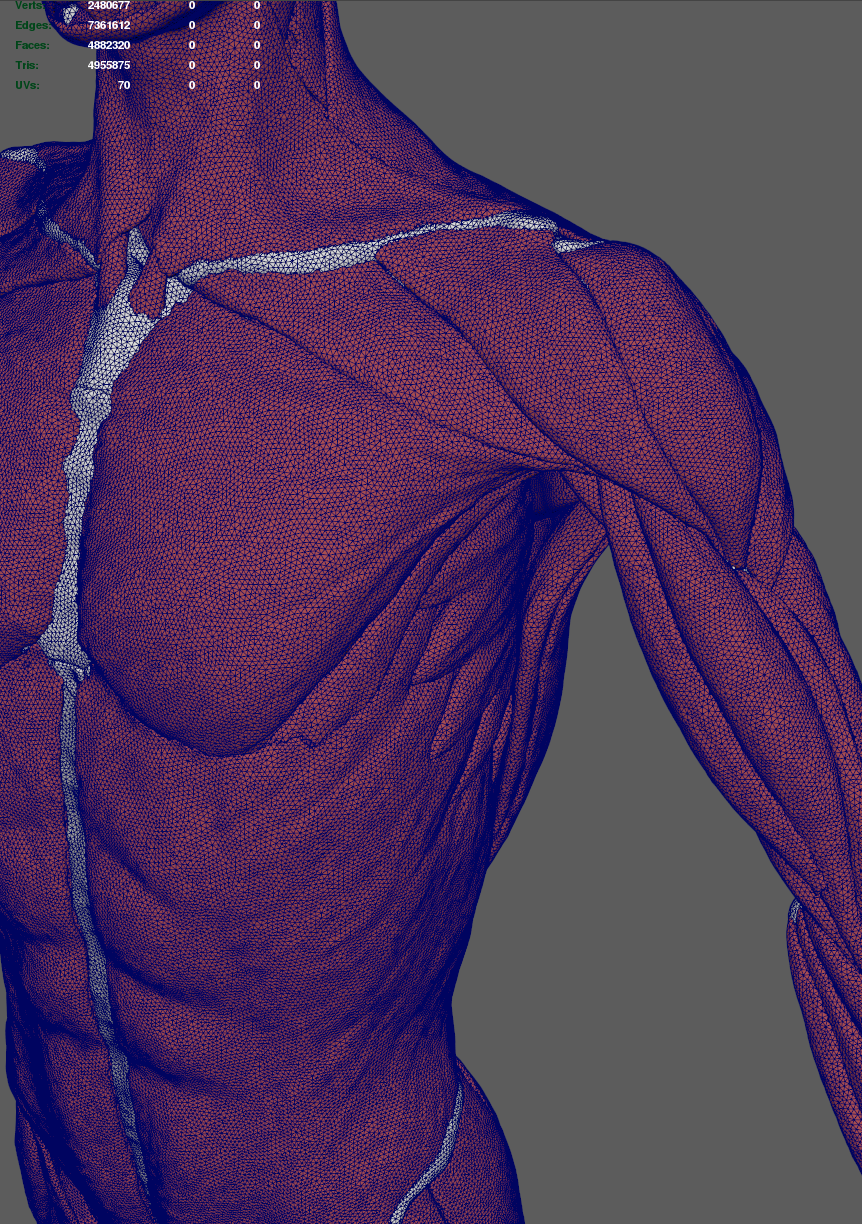
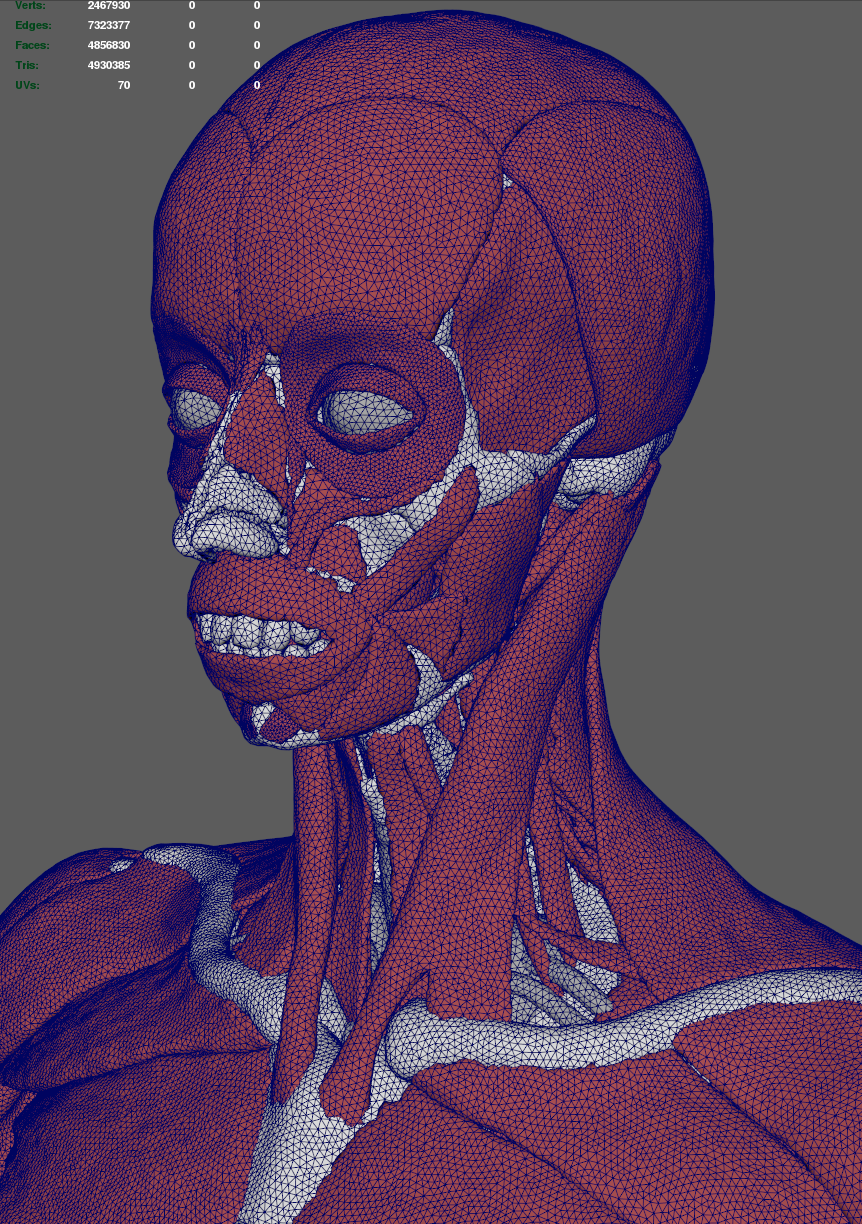
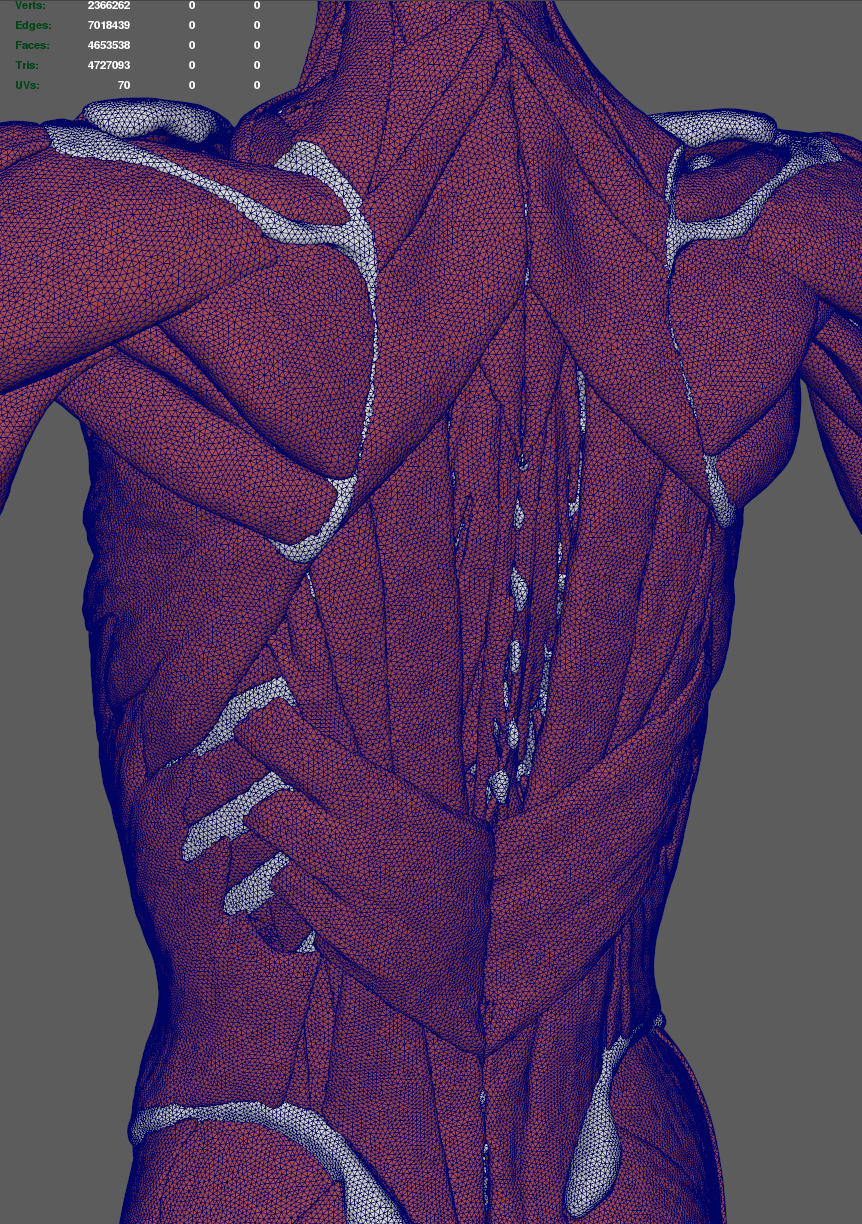
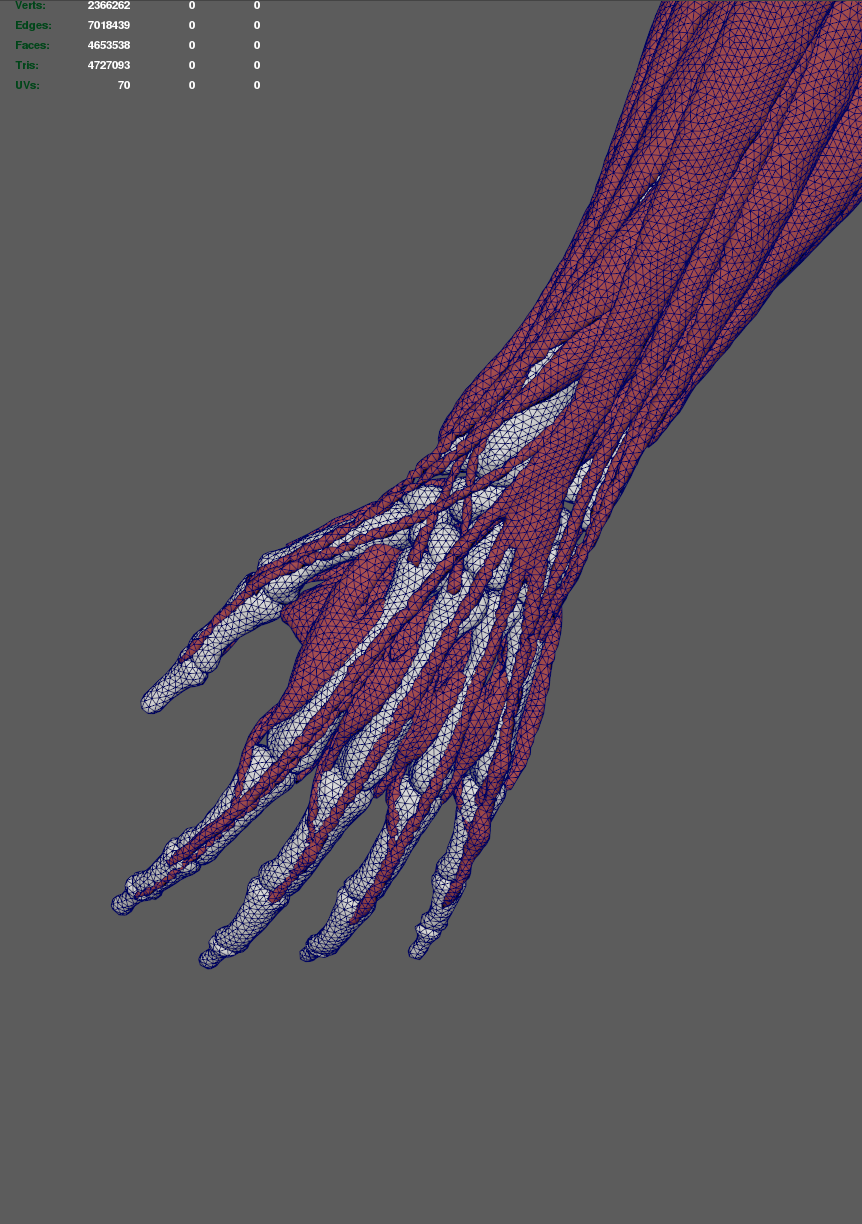
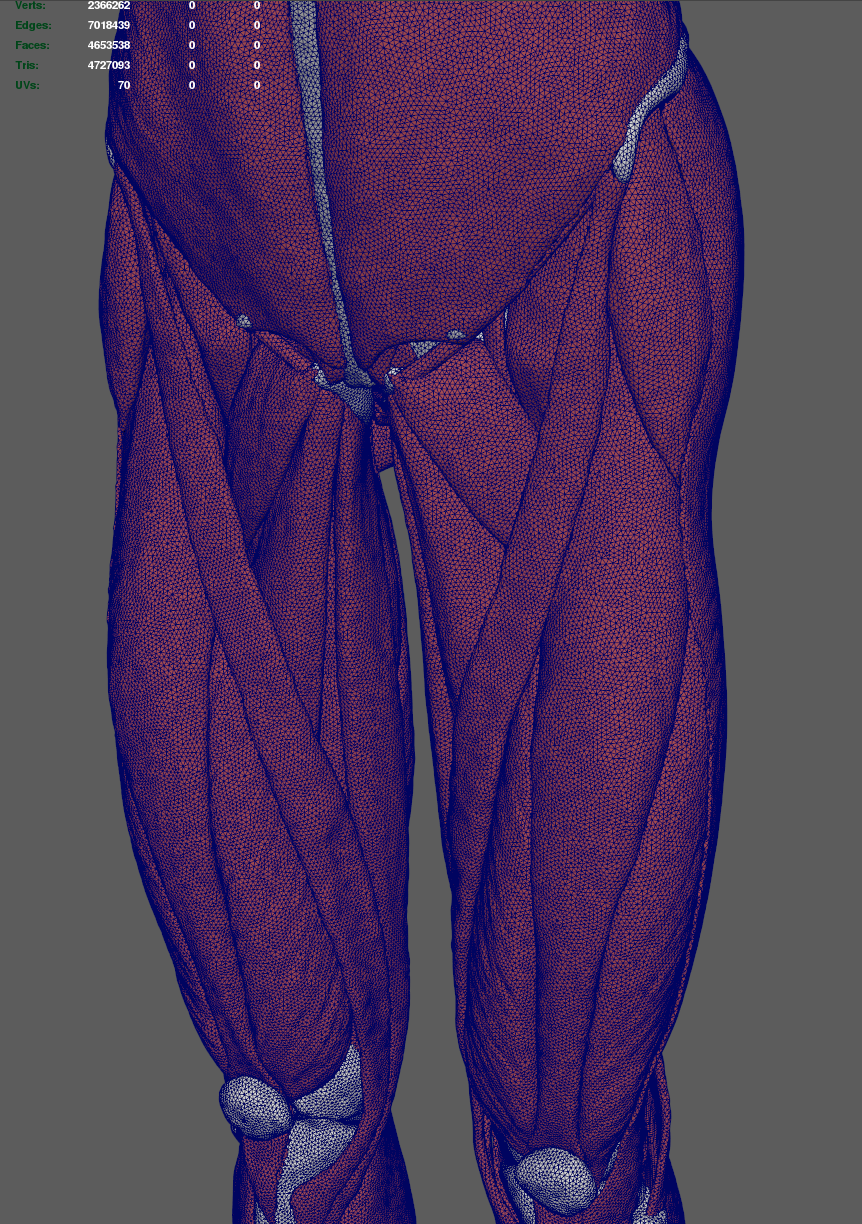
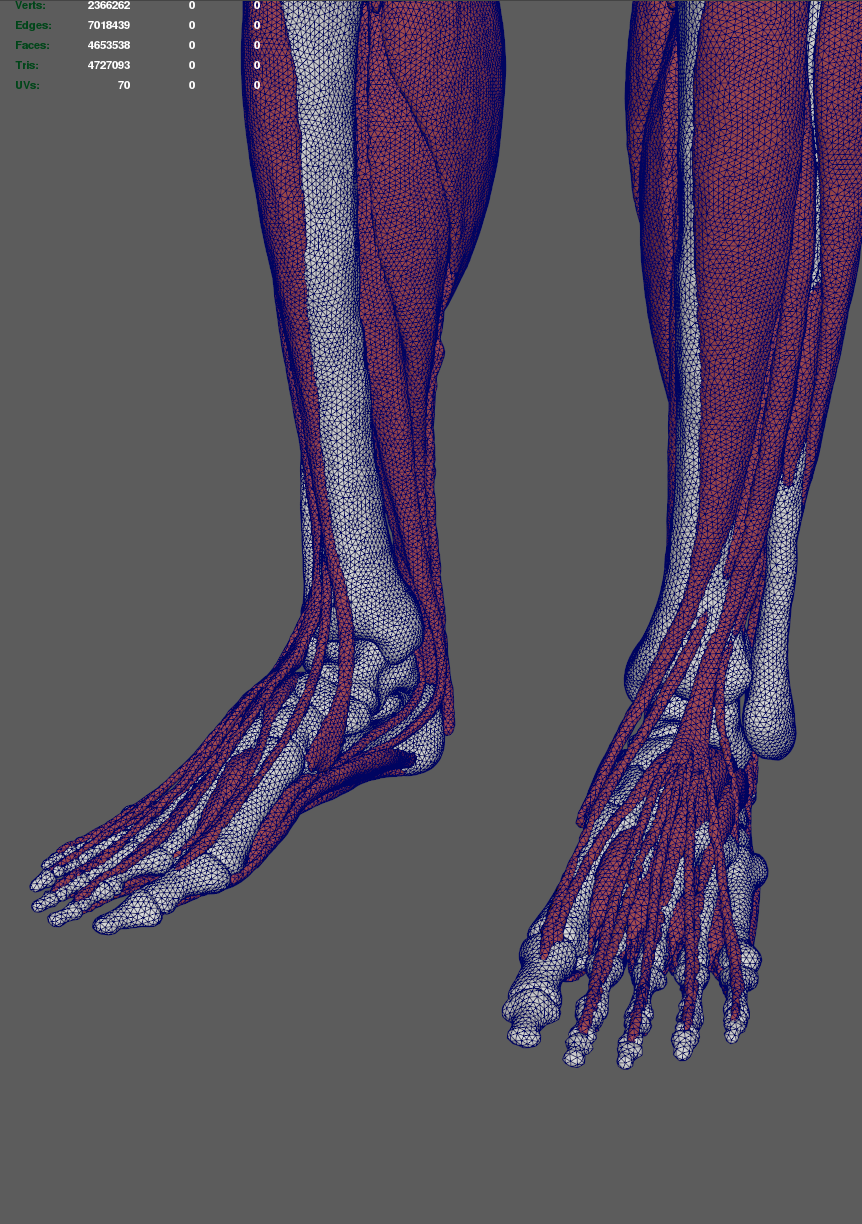
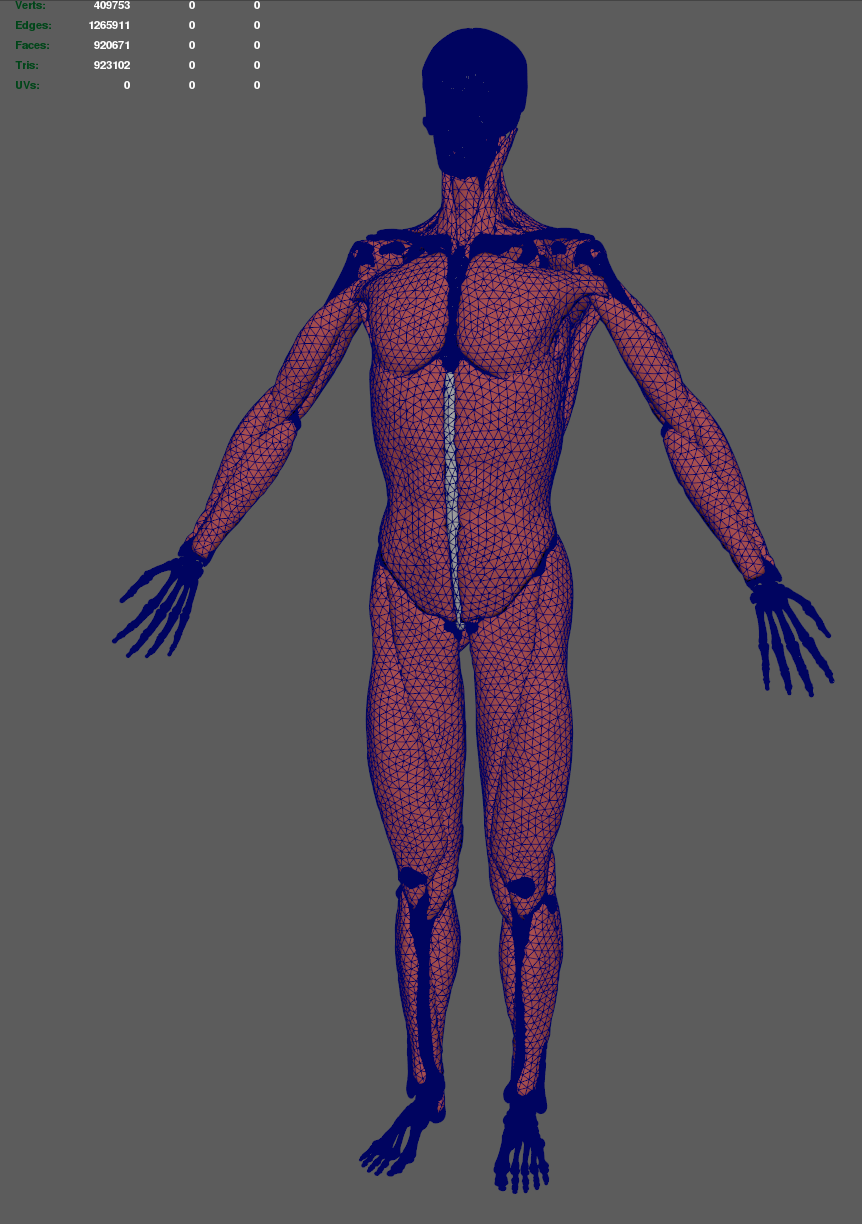
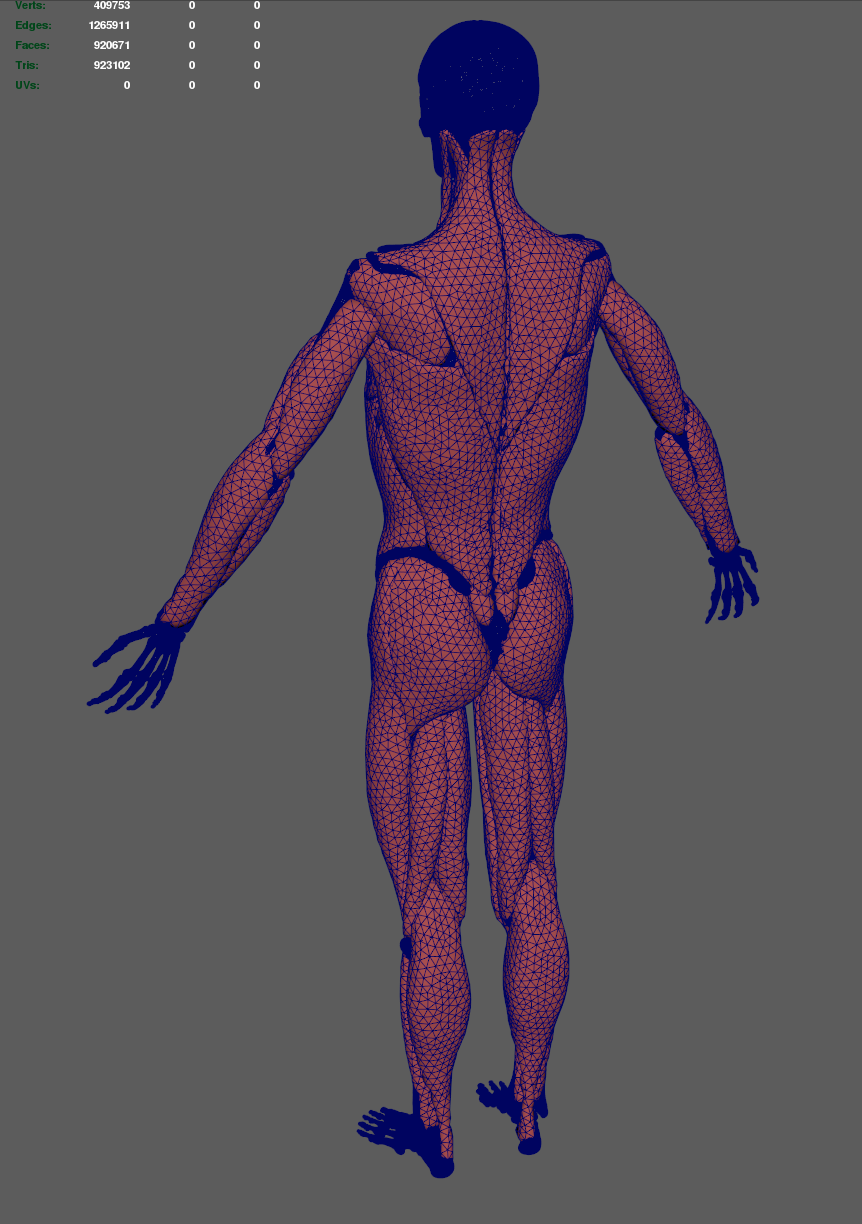
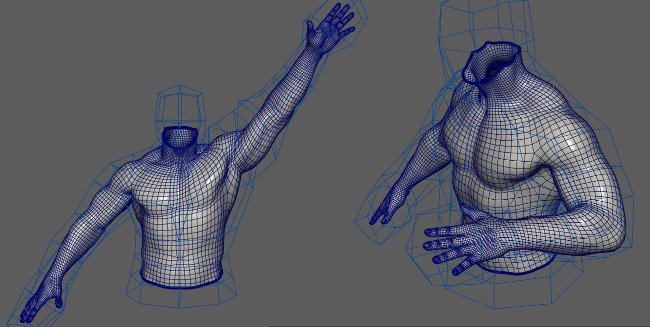
human anatomy
Included in the "scenes" downloadable archive is a complete high-quality human anatomy asset with multiple LODs, that can be used as a starting point for muscle simulations, reference, etc.
Credit goes to Database Center for Life Science Research Organization of Information and Systems. |
|
|
|
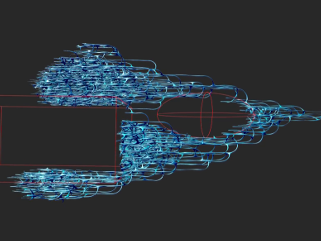
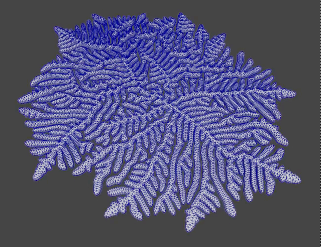
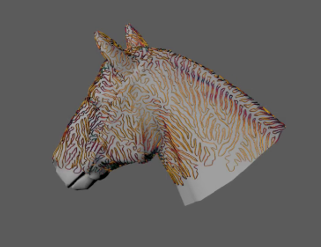
surfaceFlow / pointCloudFlow
These two nodes estimate the local differential quantities of mesh surfaces and point clouds. Generated data can be used to control instances, hair, dynamic effects, etc. |
|
|
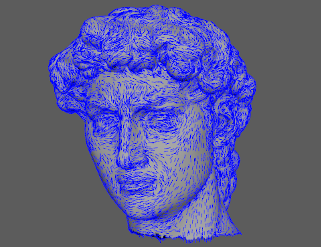
Surface flow
calculated for
arbitrary mesh
object. |

Surface flow vectors
used for procedural
hair grooming. |
|
|
|
Scales and feathers
that behave nicely
and don't flip. |

Monet painting like
effect created using
the surface flow
vectors. |
|
|
|
skeletonize
Procedural generation of skeletons from arbitrary geometry. |
 |
Skeleton mesh created from
arbitrary mesh object. |
|
outline
An alternative viewport selection feedback system that is easier to work with in many cases compared to the standard one.
|
 |
Video tutorial outlining the
main concepts and basic
workflow. |
|
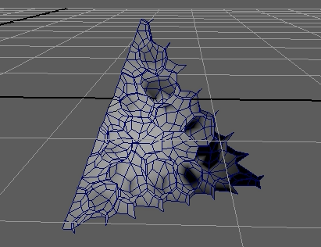
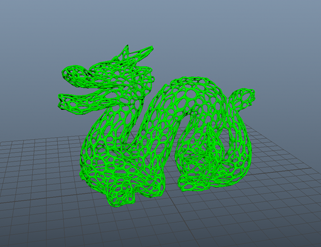
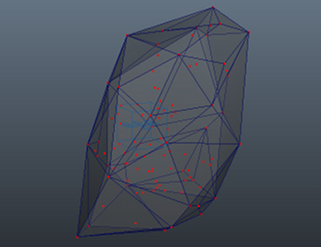
tetrahedralize
Generates
constrainted, or conforming
tetrahedralization,
cellularization,
triangulation, convex hull,
tessellation of arbitrary
mesh geometry, or point
cloud. |
|
|
|
|
|
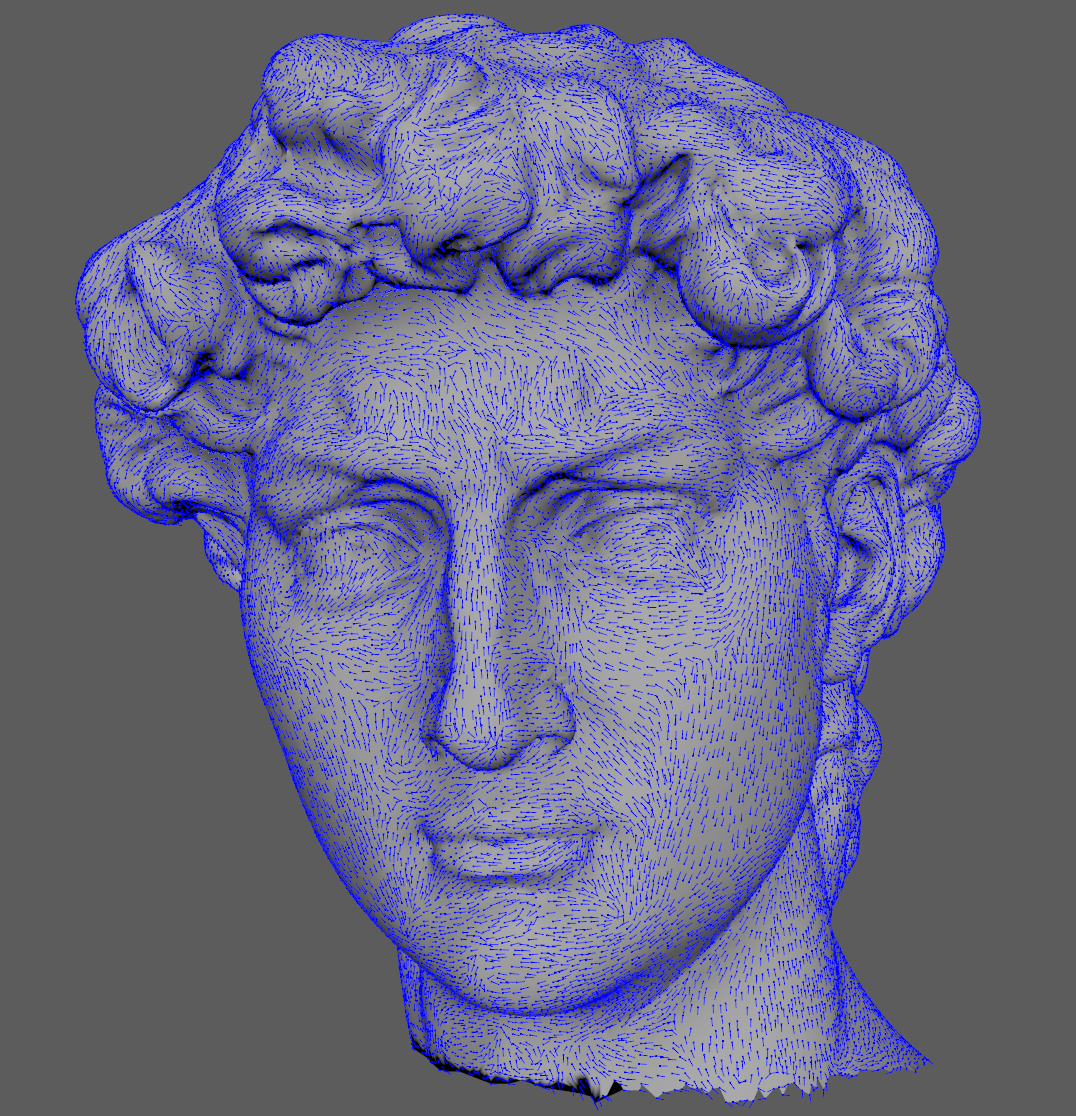
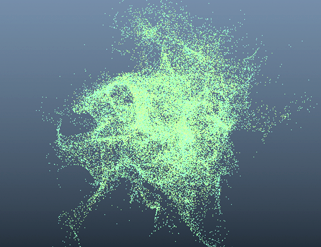
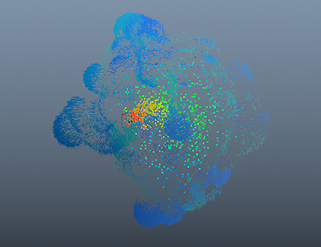
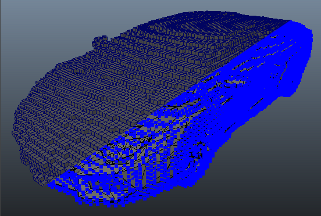
remesh
Geometry reconstruction from oriented and unoriented point clouds, as well as from arbitrary mesh geometry.
|
|
|

Morph between
arbitrary mesh
objects. |
Prepare high-rez
mesh scans for
rigging and/or
simulation, by
remeshing them to
optimal topology. |
|
|
|
 |
video tutorial 1
video tutorial 2 |
|
|
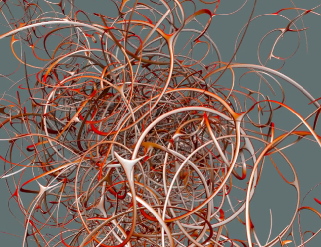
|
Graphic examples
by Firas Ershead. |
 |
|
|
|
cameraFrustum
Represent camera frustum with mesh geometry.
|
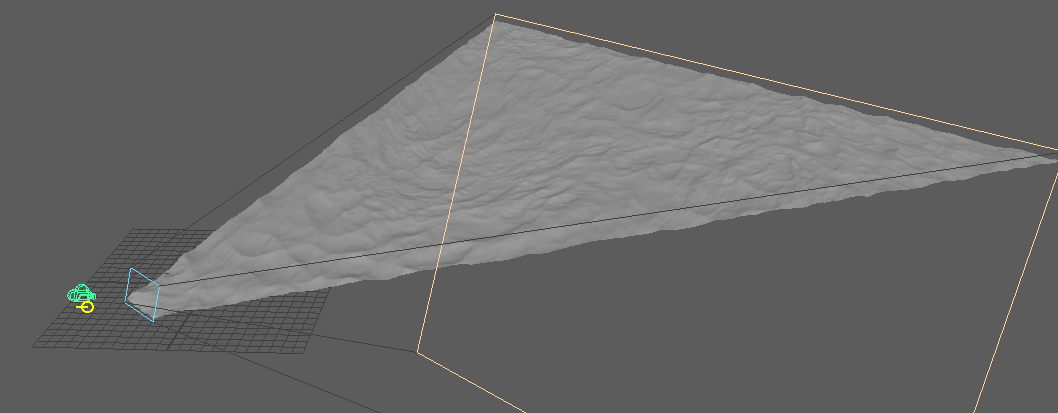 |
Clip scene objects with the frustum geo. |
|
|
|
soup-dev LLC (sales@soup-dev.com)
|
| |